Stripped and Primed Carousel Design
  • Home
  • About
  • Contact
  • Blog
  • Store

Stripped and Primed Carousel Design
Blog

DIY - Coffered Ceilings

2/1/2016

0 Comments

 
It was New Year's Eve and we had plans to re-create our awesome New Years Eve from the previous year when we had attended our neighbors party. They had a few babysitters on hand and we sent our kids upstairs while we mingled with other adults, drank adult beverages and ate yummy adult foods. We called the kids downstairs to write their New Year Resolutions onto Chinese lanterns and send them off into the dark nights sky, (something I've done with our kids the last several years and wanted to continue to do with our new neighborhood). It was a blast.
We sent the kids back upstairs with the babysitters and apparently forgot all about them after someone brought out the Cards Against Humanity game and that's when real fun began. A few neighbors trickled home and but we stayed, along with three other couples and brought in the New Year with hysterical conversations, Champaign and really tired children.
Only this year we had decided as a neighborhood that we would host it at our house.
And wouldn't you know, the strep throat two of  my kids had over Christmas decided to creep back up and got me and one of my other children. We were miserable and there was no way we were going to host everyone in our germ invested home for a party.
We made the necessary and sad phone calls to cancel our New Year's Eve Party this year.
We were stuck at home sick, with sick kids.  
Bored.
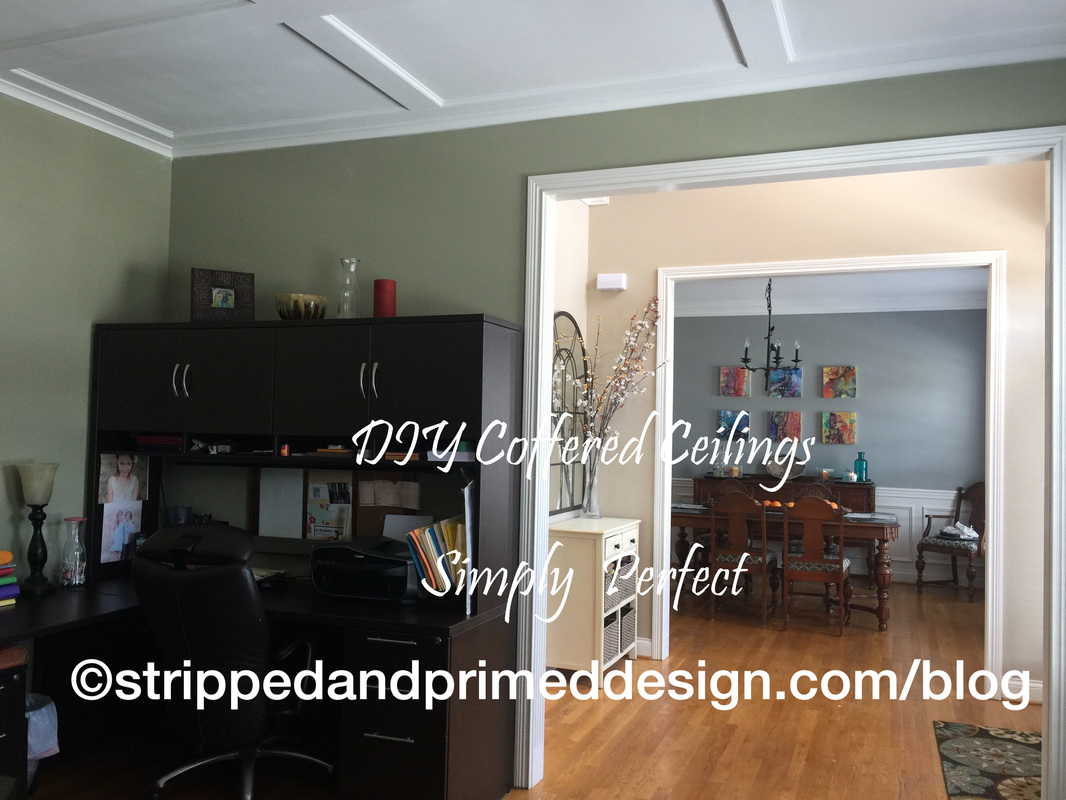
And as we sat in the dining room staring at each other we commented on how nice the crown molding looked that we had hung over the summer. Then we both glance over into our home office, adjacent to the dining room and without missing a beat, said, "we should really do something in the dining room".
And so it began.
We started googling "coffered ceilings" and read a few blogs and tried to come up with something appropriate for our office. We drew up about 25 different sketches for how the wood would be able to lay based on where the studs were.  
And I began to think that New Year's Eve wasn't a waste after all, we'd sit here and "plan" our coffered ceilings for the office to be completed in the coming New Year.
But I was wrong. Apparently we were planning the coffered ceilings we were about to start installing that night.
It was 5:30pm and my husband looked at me and said, "do you think Lowes is open right now?" And I looked back at him and was like, "why are you going to Lowe's now?"  But he didn't have to answer. I saw the answer in his gleaming eyes, "to go buy wood for the ceiling, of course".
And just like that he was gone.
When he arrived back home he had 10 5 1/5" wooden boards that were 12' long each and enough skinny molding do go inside the interior of each box we had laid out in our diagrams. 
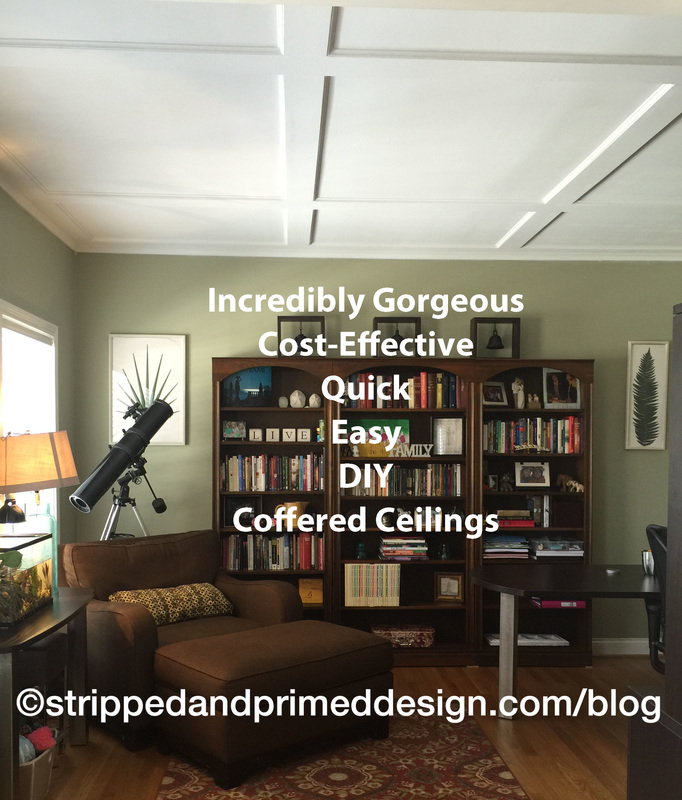
And you guys, check this out. It came out amazing!
Picture

I'm not going to lie. We did a lot of it that night.
In between some chicken noodle soup and putting kids to bed we were drilling, banging, painting and drawing more diagrams. We had a few hiccups, but it really went smoothly.

The best part is that we were able to do the coffered ceilings for roughly under $300.

Here is what we did right:

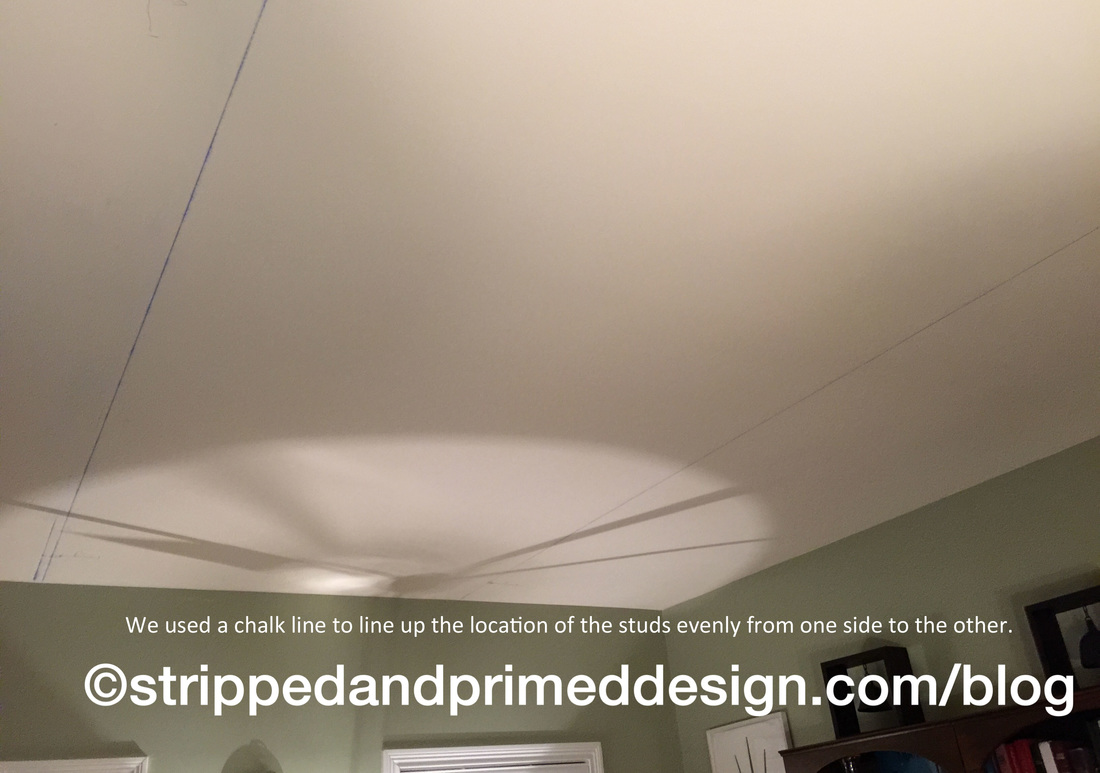
1. We spent a lot of time drawing, re-drawing, and drawing again...on paper...and then on the ceiling...the measurements of the ceiling; exactly where the studs were located and how we could best position the wooden boards to be the most symmetrical as possible and be in the studs.

Originally my husband thought we'd place three rows each direction, creating 12 boxes. But due to the size of the room and my desire to have an open box in the center of the room rather then two boards crossing to make an X, we went with only two boards each direction, creating 9 open boxes.
Picture
  
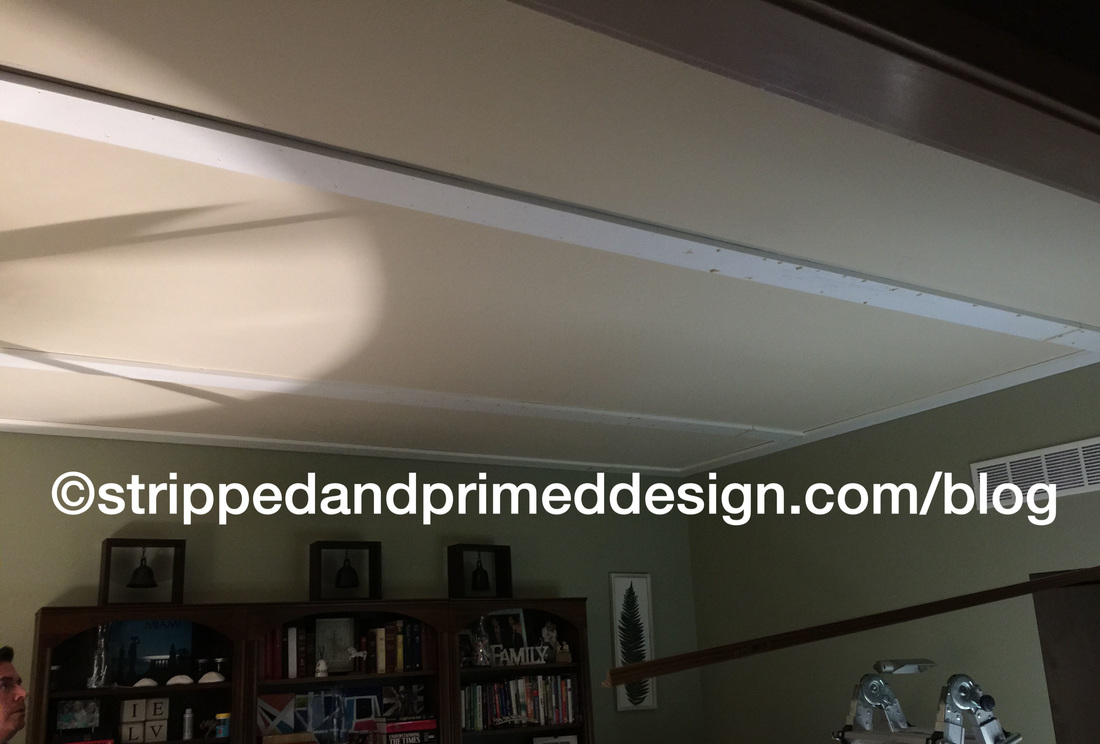
2. We hung the perimeter of the boards first. 

3. We nailed in the "fixed boards" that ran perpendicular to the studs in because there was only one place they could be placed. The boards we bought only came in 12' sections and of course, the length of the room is 14'. So it was a bit tricky to have to cut and measure the 2 foot difference and line it up and get it straight and then putty it in where it looked even. due to where the studs were we had a larger space in the middle with two identically smaller spaces on the outter rim.
Picture

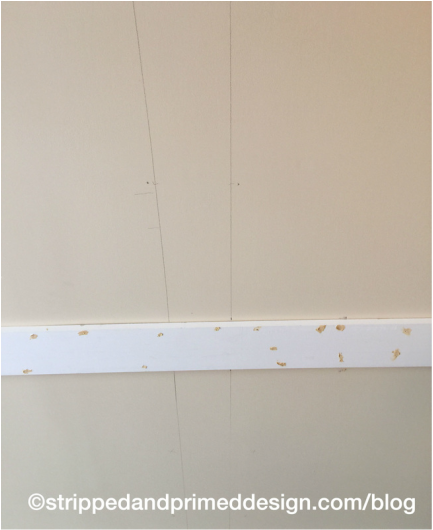
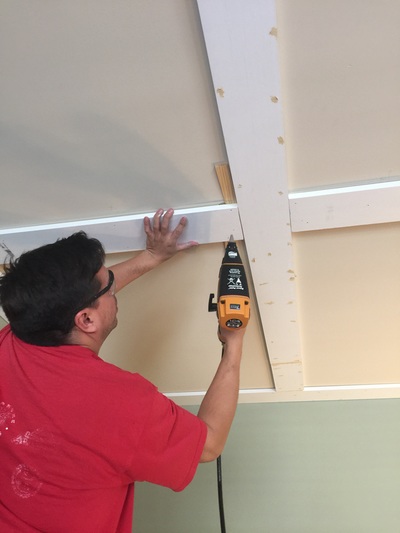
4. Next it was time for the cross boards. Even though we had our drawings on paper for where to hang these, and we had marked them on the ceiling. I was a little hesitant. So I held each board up and drew a line on either side of the board right where it was to be placed. Then I measured the inside of each opening to be sure each opening would be the exact same measurements. These cross boards could be hung anywhere since the studs ran perpendicular instead of the same direction.

My inside boxes when measured kept turning up different sizes by just an inch or two. I then realized I had counting for the width of the boards 5 1/2" three times then dividing where they needed to go, which was on our original plans instead of two times which we ended us using only 2 cross boards so I only needed to account for 11" extra inches instead of 16 1/2".  Once I corrected my mistake we literally traced them on the ceiling again before we nailed them in.

Picture

5. We had a few boards that when flush against the wall were not even with the adjacent boards. We used a small wood wedge in between the board and the ceiling to align it with the adjacent board. Once the wedge was nailed in, we just bent it to break it off. The interior trim/molding would cover it up later.

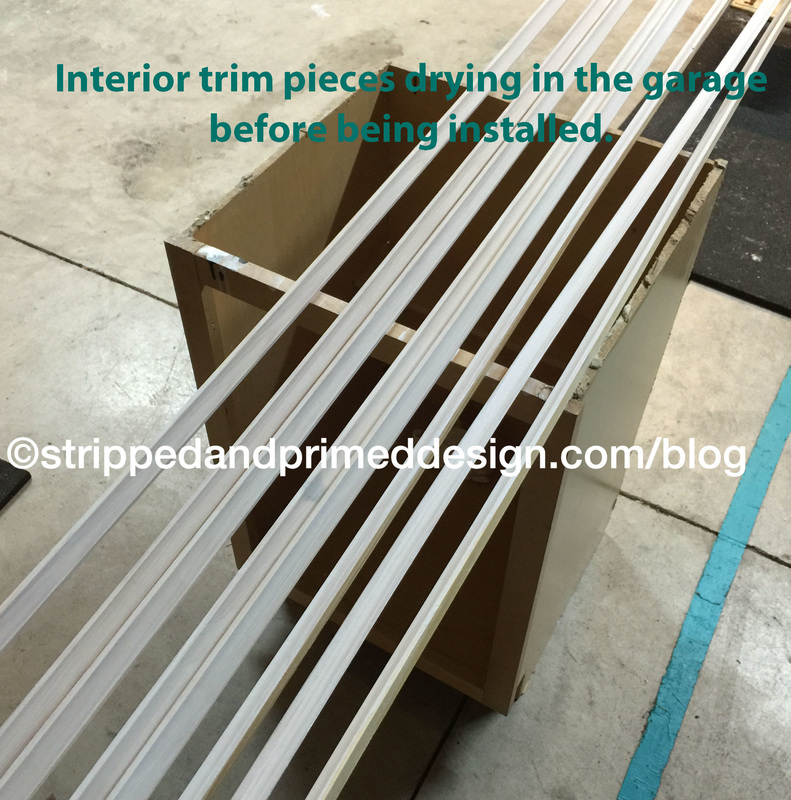
6. While the 5 1/2" boards we bought were already white, the interior trim pieces we bought were not. So we painted those first before we nailed them up. Which was nice...until we ran out of wood. We made a quick trip to Lowe's to get the remaining trim pieces and instead of painted a first coat on those and waiting for them to dry, we just went ahead and nailed them up unpainted.

It is really not a big deal either way, but if you have the time putting a coat of white paint on them first is helpful. I would not use ceiling paint. We discovered that the ceiling paint is extra thick and goopy and sticky when applied with a paint brush. Ceiling paint goes on much smoother with a roller at the end to cover everything. So I suggest just a basic white paint on the trim before it is nailed up.  

Picture
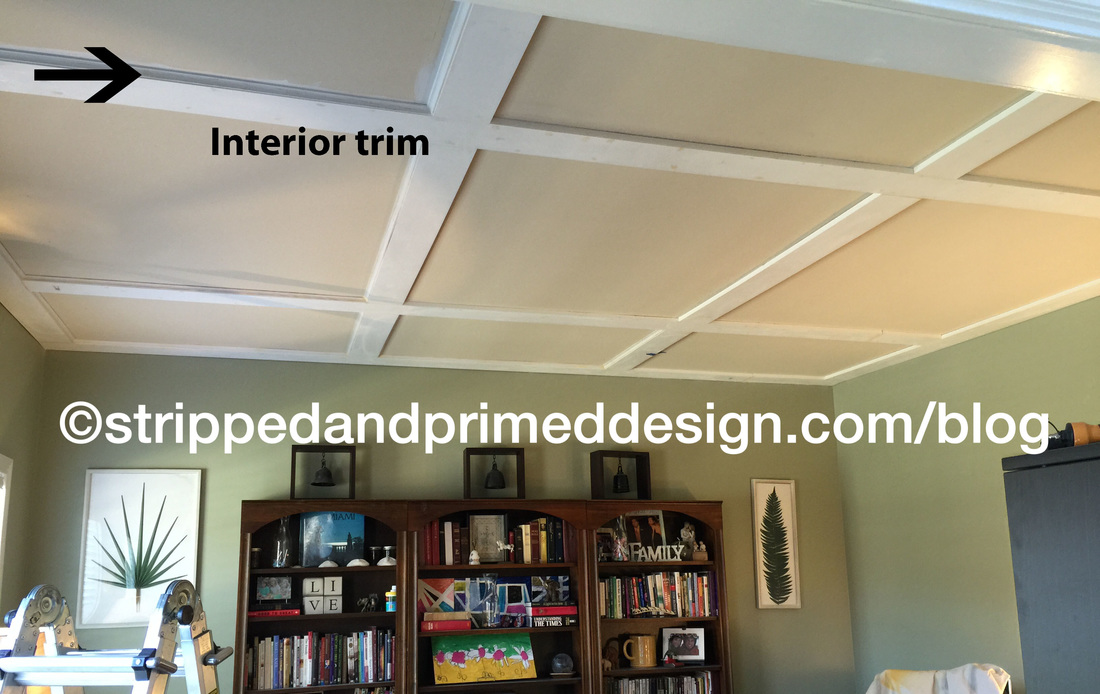
7. We measured each interior trim piece as we went.

Measured.
Cut.
Hung.
Repeat.

This was tedious, but went quickly. Each measurement was slightly different and we needed to be sure the angled cuts lined up perfectly each time. We had 9 inside boxes with four cuts for each box. But we got it done quickly.

Picture


Here is what we did wrong:

1. The first thing we did wrong was as we nailed up the boards we began putting wood putty in each nail hole very carelessly with the thought that we would just sand it down later and paint over it.

It was extremely hard to sand down later. As a matter of fact we sanded and painted several times because the wood putty was such a different texture that we couldn't get the textures to match up. It took lots more sanding than anticipated.

By the time we hung the crown molding around the exterior edges, we got smart enough to use a very small amount of wood putty and to wipe as much away as possible while it was still wet. This eliminated much of the sanding and smoothly later on.

2. The second thing we did wrong was we verbally announced to each other that it was almost as if we knew what we were doing because it was going so smoothly.

Never say these words out loud.

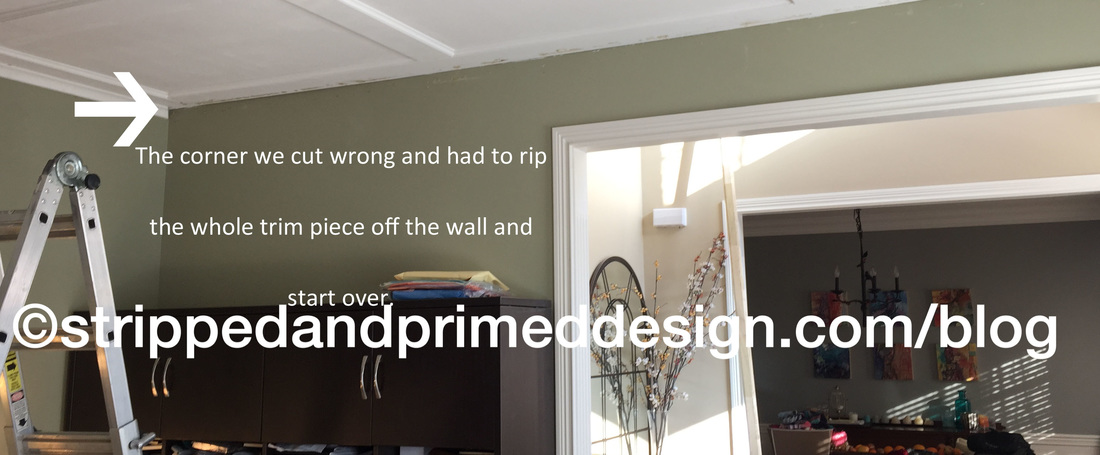
Moments later we moved the saw from one side of the room to the other and did not notice that he had moved from it's "0" position. Therefore the next 45 degree cut we made for the crown molding was not what it was supposed to be. However, we did not notice as we were feeling so confident in how well we were doing that we covered it in wood glue and nailed it up. We cut and trimmed out our next piece and went to dry fit it only to discover out corners did not match up.

We had to pull the whole panel off the wall, scrape off all the glue, cut the board short and cut a replacement corner.


Never say outloud that it looks like you know what you're doing!
Picture
3. We tried to paint the ceiling paint on the boards with a paint brush. This was a big mistake. The ceiling paint was heavier than other paints we've used in the past. It was goopy and sticky and painted almost as if you were putting an oil based paint on top of a latex paint. It just didn't work well. We had a short 6" roller that we got out and used on the boards instead of a paint brush and it looked like a million bucks compared to the paint brush. So we learned that we had to use a roller anytime we were applying the ceiling paint.

NYE DIY Coffered Ceilings Was A Success!


All and all we started our New Year off to a good start with new gorgeous coffered ceilings in our home office. After our long New Years Eve weekend we had to go back to work and life and we had to finish the final touches in the evenings. All together it took us about a week to get it all finished to where we were satisfied...

Well satisfied enough. Now I want to repaint the walls that I had just painted before we started this ceiling project! 

Painting the trim work and the ceiling white alone made a huge difference in this room. None of our ceilings are white in this house. They are all the same colors as the original walls were. We painted the dining room ceiling white and now the office and it has lightening up those two rooms tremendously.

The coffered ceiling and the molding, along with the white paint, make our home office look exceptionally nice now.

I'm so pleased with how it turned out. 

I'd love to know what you think!  

Here is a final look, lounging in the settee looking out of the office towards the front door and dining room.

Picture
0 Comments

Coffee Table Remodel

1/12/2016

0 Comments

 
Picture

You guys I bought this coffee table from a yard sale website and as almost all the furniture I get from these types of places, it stunk! And it stunk bad. Maybe not as bad as the gun cabinet remodel, but still bad. Which means I have to hide it from my husband. He just doesn't have the same vision for "things"  (okay, we can call it "junk") that I have.

Trust me, he has some great visions for other things, like our coffered ceilings we put up in the office, our mudroom bench we built in the garage, the crown molding he put up in the dining room and the window bench he built in the kitchen! 

But when it comes to old furniture, it's usually just trash to him. And if I hear "why in the world did you bring that into my house" one more time, I'll quit refinishing furniture all together. So for your sake and mine, I have to hide it...until he see's how great it turned out and then he drools over it with me and tells me what a good job I did!

So, like any good wife hiding something from her husband, I "ran errands", came home and backed my car into the driveway, pulled the dirty smelly coffee table out of my trunk and carried it around to the back of the house and set it by the back door. I quickly found a tarp and covered it. I figured sitting outside in the fresh air would probably do this piece of wood some good anyway. It seriously needed to air out.

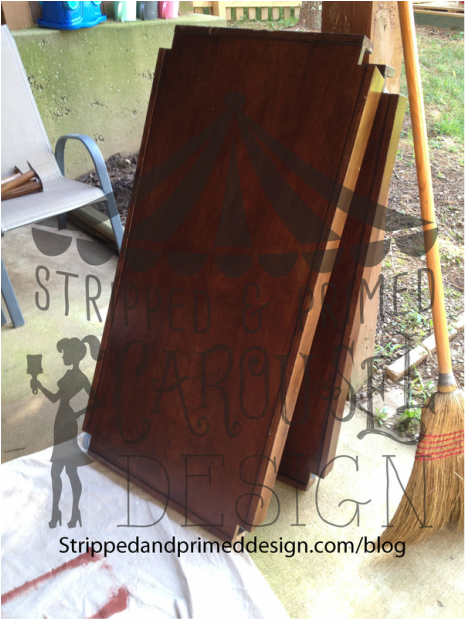
So the first thing was breaking it down to get it cleaned up so I could begin turning it into what I envisioned! I knew I wanted to re-stain both surfaces in a light wood color and I wanted to paint the outer edges and the legs. I wasn't sure what color yet.  

So I got out the vinegar, lysol and bug sprays and went to work sanitizing this sucker!

Picture
Unfortunately I did not get a photo of it before I unscrewed it all. But you can see it was just your average dark cherry wood coffee table. Nothing special really and the fact that I paid the lady any money at all for it should tell you I paid too much. In my opinion these dark cherry pieces are a dime a dozen and are quite unattractive. But trust me, I'm not saying all dark cherry is terrible. I have many dark cherry wood pieces in my house I love deeply. But I also have some I can't wait to get my sander on!
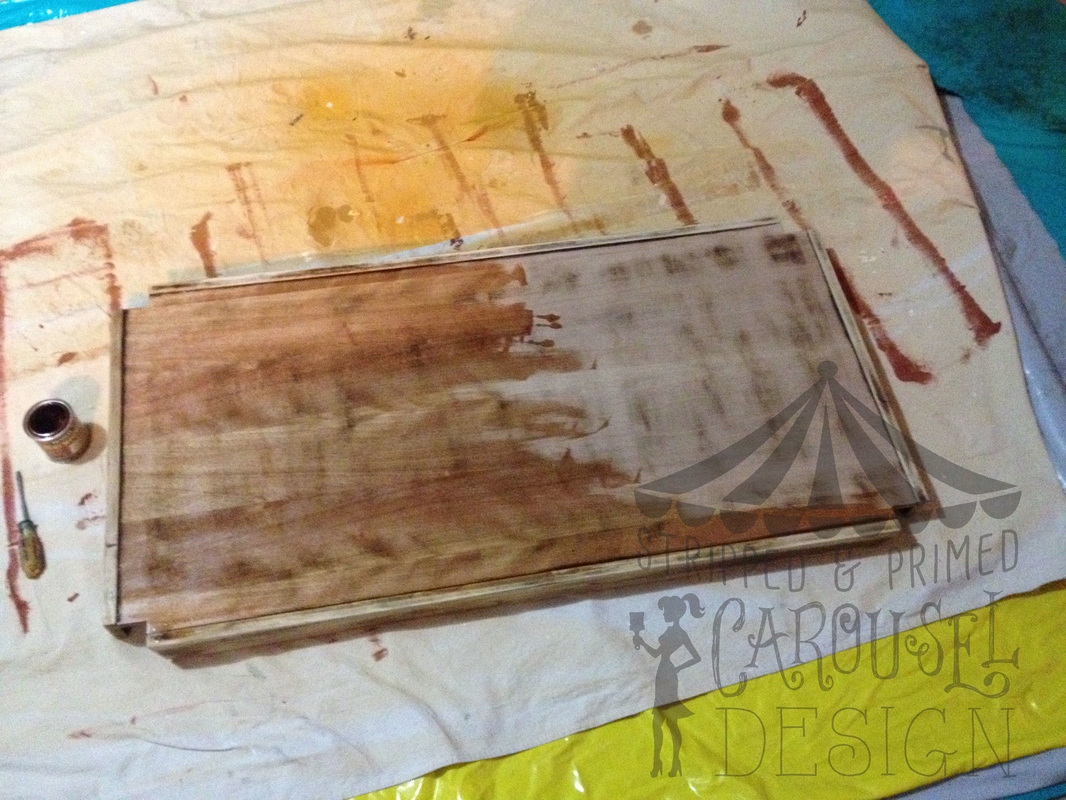
I sanded it down the best I thought I could do. I cleaned it up, prepped it for staining and begun applying a pecan finish stain. I love this mimiwax product! I've been using it on all my Growth Chart Rulers as well!

It was only after I began to apply the stain that I realized what I thought were imperfections in the wood veneer were actually old cherry finish marks that did not come off with my original sanding and stripping.
I  was not happy with the way this was turning out and went back to sanding and stripping for a second time!
Picture

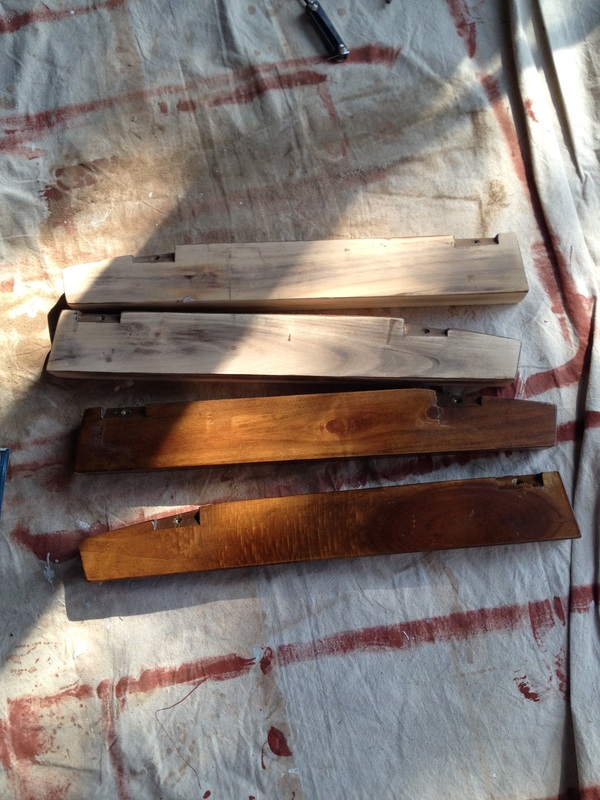
As I mentioned above, I knew I wanted to paint the edges and the legs, but I wanted to sand them as well. It is so important to me to start with what was originally there. I do not like the idea of covering up the ugly. I love getting rid of the ugly completely and starting fresh!

And so I began sanding and stripping for a second time until I was finally happy!
Picture
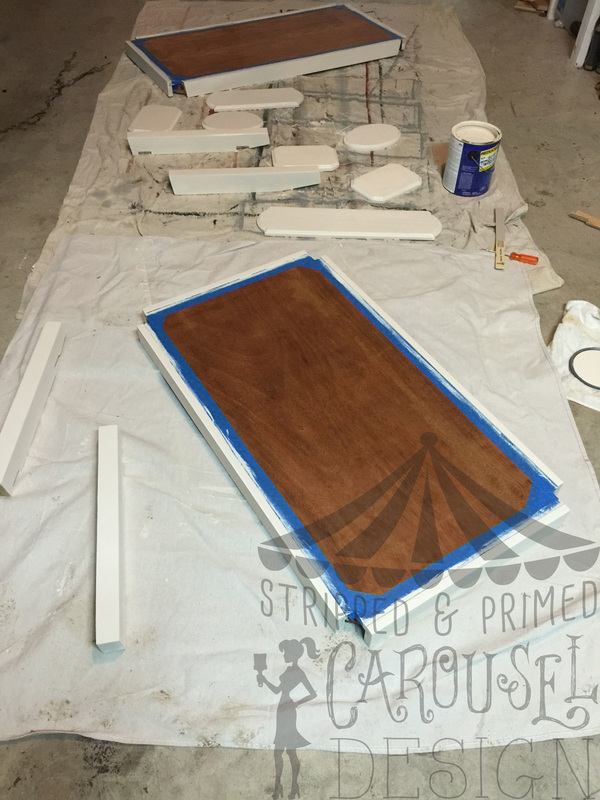
I restrained the top surfaces for a second time. Then I taped around the interior edges where I was going to paint. I really had not decided on a color yet but as I was browsing through Lowes I stumbled upon their "sale" section of paint. There was the perfect gallon for sale for $9 and the color was a cottage white!

And since I love bargains, I bought it! I starred at it for a few days before I decided to shake it up, pop the top off, and start painted!

Do you want to know how to paint furniture?


It's simple really. It is just like putting on a nice smooth coat of nail polish! Seriously.

You really don't want more than two or three thin coats or else it'll look pasty and thick and might even start to peel or clump up.

Each coat should go on very thinly. The first cost should not look finished at all and should still show lots of imperfections.

But by the time you put that second coat on it should smooth out the imperfections of the first coat and should look perfect! There is the occasional time where a third coat is needed.

It is important to let each coat dry completely before putting on the next coat!


So basically if you can't paint your nails without it looking like a hot mess than you will likely not be able to paint furniture either.
Picture
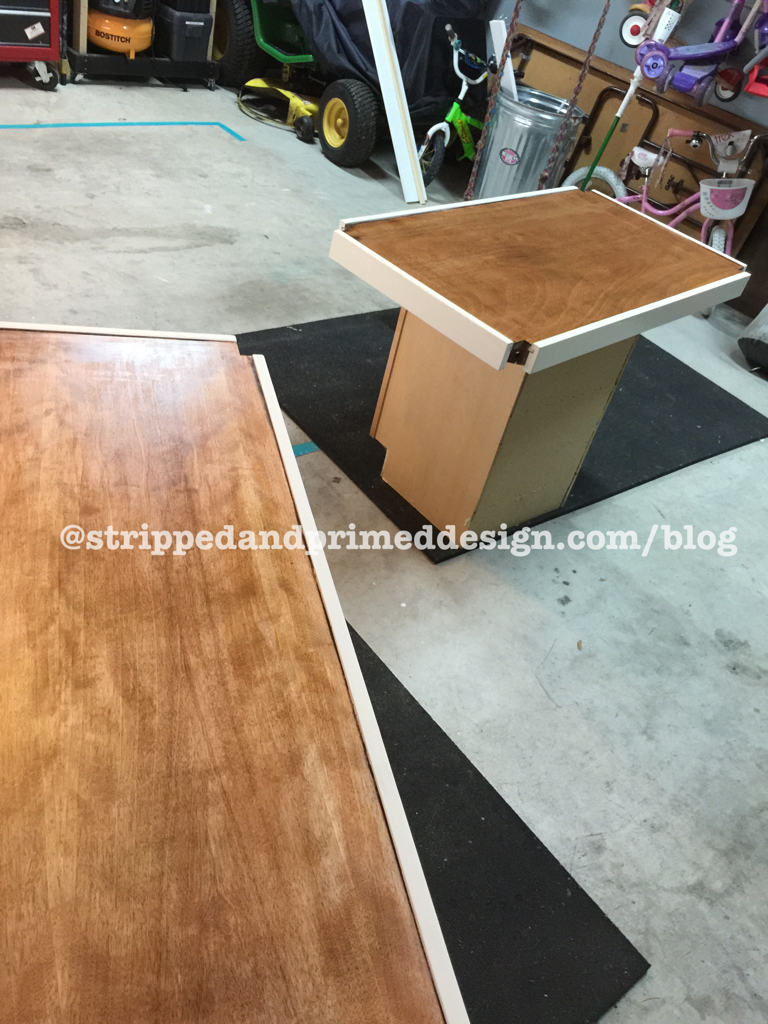
I'm sure you can guess what happened. I pulled the painting tape off of the top only to find that some of the paint had leaked through. I was certain this was going to happen and was prepared with a razor blade in hand. I gently use the razor blade to scrape off any leaked paint. I razor-ed all I could until the paint formed a straight line around the perimeter of both surfaces.
Painting was complete! Wood staining was complete! Now it was time to apply a polyurethane to protect my new project from any scratches or marks!

Polyurethane should be applied in the same way as painting! Two or three thin coats!

However rather than using a paint brush to apply the poly, I use a foam sponge brush. It' leaves way less streaks and goes on super smooth!

Picture

Don't forget to clean any brush or sponge that you use a polyurethane on outside or in a bucket (not the sink!) with a paint thinner product! Otherwise your brush/sponge will harden and get ruined (not that I have any first hand knowledge of this!
0 Comments

Mid Century Side Table

11/11/2015

2 Comments


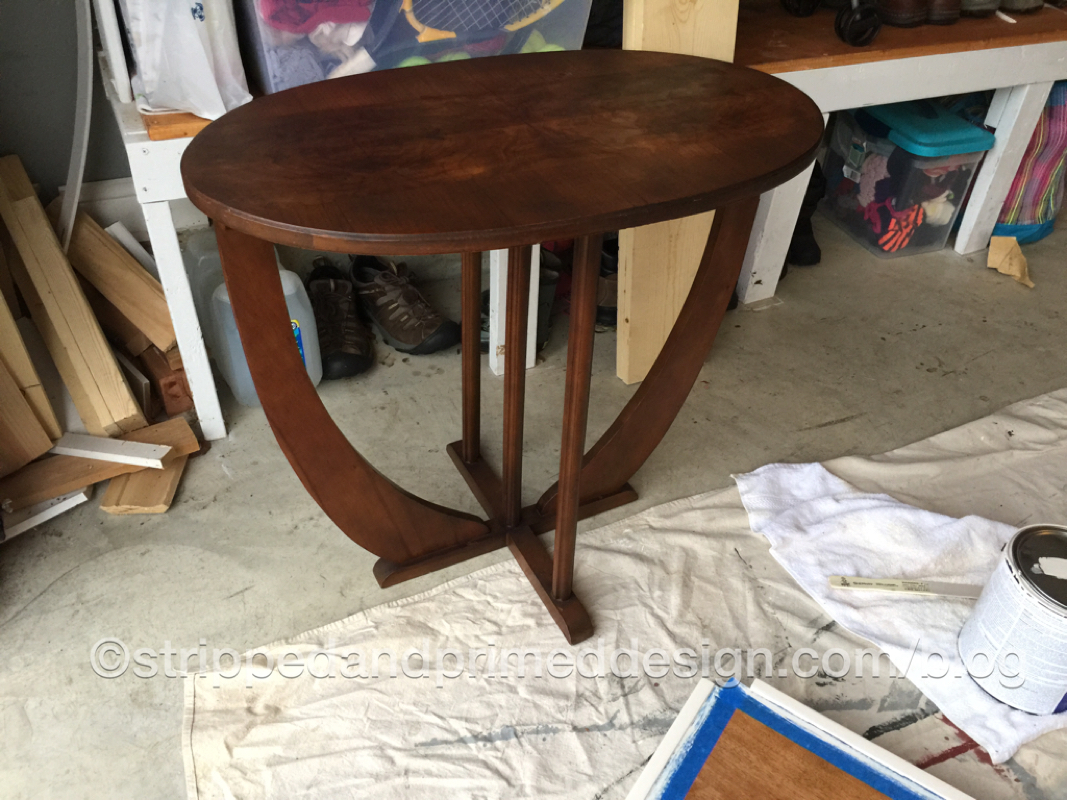
I got this little cutie today. She was accompanied by two adorable side chairs that I may go back to get another time, but for now she is the only one that came home with me.

Picture
She does need refinishing. Although she looks okay in the photo, the top is uneven and looks like someone tried to remove some water stains.
What do you think? Should I refinish her back to her original self? Maybe go for a lighter stain? Or a darker ebony? Should I paint her? I'm about to break out some aqua for a few other pieces. Not sure I can picture this little thing blue, but I definitely can picture her white or grey.
Tell me what you think?? How would you like to see her refinished?

And don't forget to thank a Veteran today! Happy Veterans Day friends!

2 Comments

Gun Cabinet turned Camo Curio

10/24/2015

10 Comments

 
I actually went looking for this gun cabinet. I had this crazy idea that I wanted to turn an old gun cabinet into a curio. I pictured it being painted bright yellow and set up in a kitchen with a cute little tea set collection inside displayed on all its new shelves. I pictured a little hook on the side where one would hang their oven mittens and kitchen aprons. 
Well guess what!???!! That is not what happened. Every used gun cabinet I found had a sale price of $120 or more and no one wanted to budge on their price...until I found this little cutie. The previous owner of this one wanted it gone and negotiated a decent price.
Picture

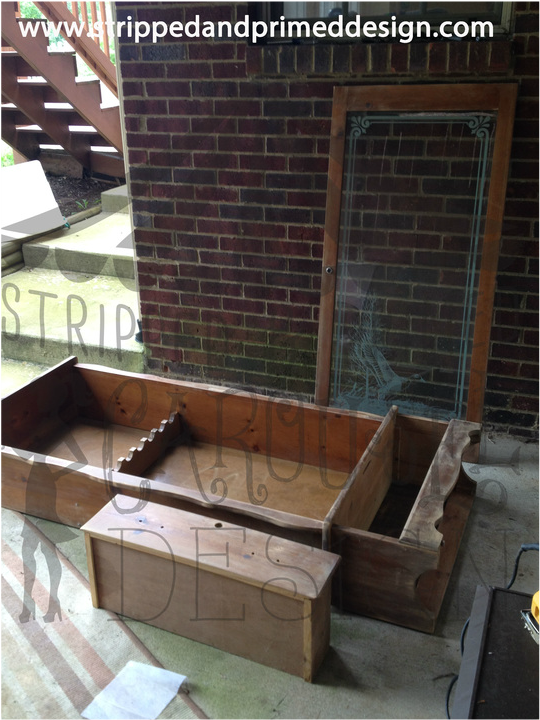
And of course it wasn't until I picked it up to realize just why they wanted it gone. If only you could smell a photo. This cabinet reeked in the worst way. I can't even describe the smell to you. Certainly it was from a smokers house. But it also smelled musty and every other bad smell you can think of combined with smokey and musty. I'm not kiddy. I hesitated to load it in my car in fear that my car would then reek for days, weeks, or maybe forever. I rolled all the windows down as I drove this one home. You can imagine my husbands enthusiasm when he saw (and smelled) this sitting in the garage. I got a, "you paid money for this?" 

And if you must know, it wasn't just the smell. Every crevasse of this little thing was full of roach eggs and spider webs and bug poop.
Lets just sum it all up and say it was beyond gross.

So I did what any normal person would do. I took it completely apart and sprayed it with a bed bug killer and Raid concoction, rubbed it down with a vinegar solution and taped dyer sheets to it to absorb the smells and kept it outside in the sunshine for days.


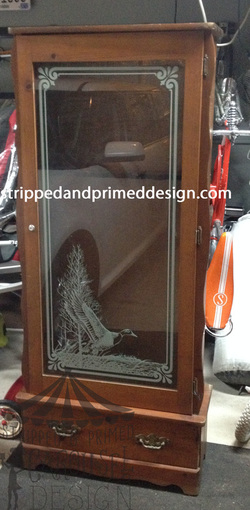
One thing I really loved about this cabinet was the etched duck on the front. When I bought this I knew it wasn't going to be painted bright yellow to house someone's tea cup collection, rather, I knew this was going to have a hunting theme to it and would go into a little boys or girls room who loved hunting and it would house his or her clothes or toys. Or possibly it would go in a man cave or home office to be used as a liquor cabinet. Especially since I planned to make it lockable.
Picture
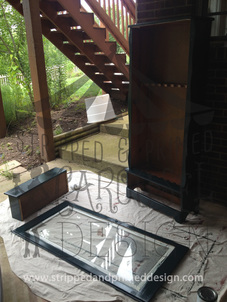
After the first step of taking it all apart to de-bug it and try to de-smell it, I worked hard on sanding it all down. And sanding it some more. And sanding it again. I believe that when refinishing a piece it is important to sand it down to its bare self. Hence the name "Stripped and primed". It's one thing to just paint over it with some chaulk paint and make it beautiful. I love chalk paint. Love it, love it, love it.  But often its used to paint over all the previous layers. And sometimes that is okay. However, I feel like it's can be similar to moving into a house to peel the previous owners wallpaper only to find 6 different layers under it. So to me it is often important to get it back to where it started and then lets make it new from there.
Picture
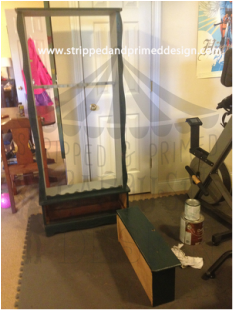
After it was sanding, and sanded and sanded, I wiped it down with a wet cloth and let it dry. I began the painting process. I chose a hunters green. A lot of thought went into choosing this color. Not really. That was a joke. I used this color because we had a whole gallon of it left over from when my husband built the kids sandbox in the back yard and he painted the bottom of it green. When I first began to paint the green was quite bright and so I mixed it with some left over black paint we had from when we painted our mailbox. Both were outdoor/indoor latex paint and they mixed nicely to form this dark green color. Perfect for my Camo Cuiro I was creating!
Picture
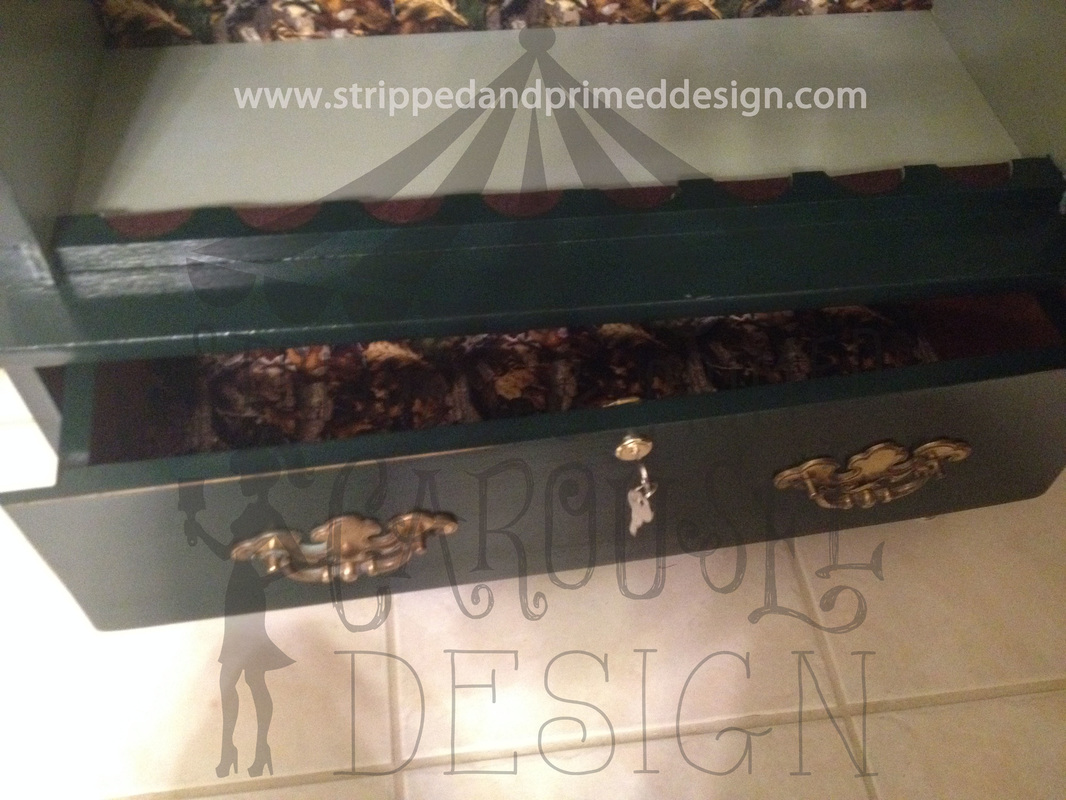
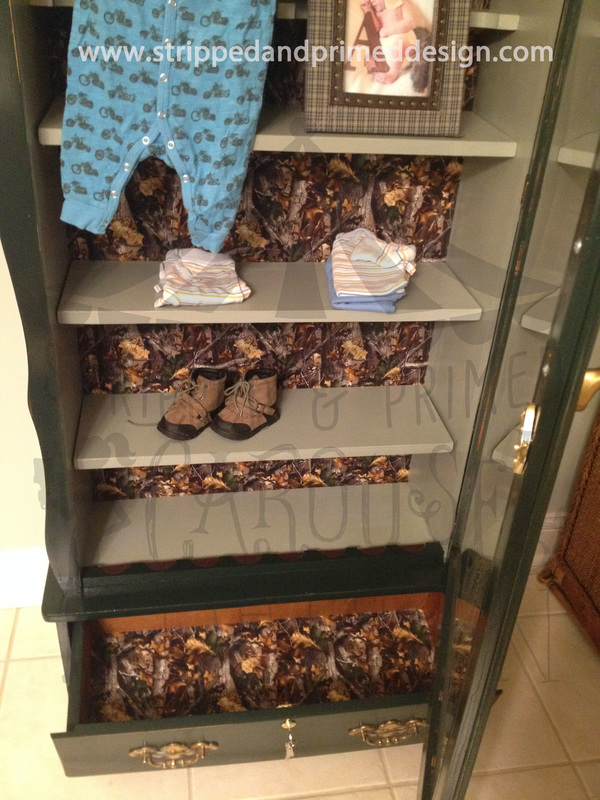
I took the back panel off and painted the interior of the cabinet grey to give it some dimension. I debated whether or not I should paint the back panel grey as well, but decided it would be really fun if I could find some awesome hunting fabric or contact paper to cover the back panel in. I ended up settling with a fabric because I felt it would be more durable than contact paper. I cut shelves and painted them grey as well. I installed the shelves with simple L-brackets and not only did I line the back board in a hunting fabric, but I also lined the bottom drawer with the same fabric. It was beginning to look amazing. But even once I had put it all back together there were so many finishing touches that still needed to be tended too.
Picture
I removed the old locks that no longer had keys as one was a silver and one was bronze. I keyed them alike with new gold keys to match the pulls. I had to polish the pulls and while I thought about replacing them, I decided to keep them because I really loved the character. They just took a lot of polish and elbow grease but cleaned up nicely. I added new felt to where the half circles were to rest the guns on previously, but I liked the detail there so just needed fresh felt. I added a pull handle to the cabinet that was not there before. I installed new leveling glides on the bottom so it no longer tilted or rocked when upright and I also had to realign the glass cabinet door so it no longer rubbed on the bottom when opening and closing. I gave a good sanding at the end to give it a wear-and-tear look and then I put several coats of polyurethane on it to keep the paint from chipping in the future.
Overall I am extremely proud of how this "Camo Curio" turned out and I think it would make such an awesome addition to a boy or girls hunting theme room. It would also fit great into a man cave. You could put books in it, or collectables, or would make a perfect liquor cabinet you need to be able to lock your children or spouse out of with a perfect drawer at the bottom for your cigars. All in all, I'm in love with it and I hope you like how it turned out too!
Picture
Heres a final look.
Picture
10 Comments

Chairs Chairs Chairs...Mid-Century Chairs

10/23/2015

0 Comments

 
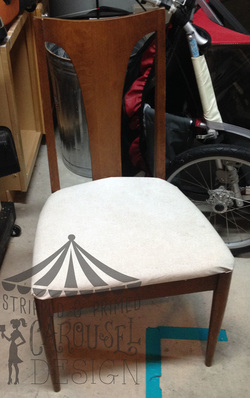
I mean really, is there anything cooler than a gorgeous Mid-Century Chair? Check out this beauty that I picked up at a garage sale.
Picture

I will not be painting this girl. I will be polishing up the stain and I already have my fabric picked out. I am going to pair it up with an amazing sewing stool from the mid-century as well that I came across not too long ago! I almost passed up the stool because it had missing buttons and was ripped where they used to be. I try to follow my rule not to buy anything broken...but how hard can it be to find the right size fabric buttons and cover them in fabric and and sew them back in? I guess I'll find out soon.

This chair and the sewing stool look like they were a match made in heaven and they haven't even been refinished yet! I am super excited about getting started on this project.

I actually thought this was a Bernhardt chair when I first picked it up. But with a quick google search I found it
here and here. Looks like a Broyhill Brasilia Chair. Pretty cool huh?
I was not actually out garage-sale-ing it, I was headed to the grocery store and I had just my two girls with me. They noticed the garage sale on our way to the store and asked if we could stop. Of course I said yes! But oddly it was 4pm on a Saturday afternoon. The girls picked out a little pink ring and watch and I got this baby.

It's been a several weeks now and on my recent trips to the grocery store driving the same route, I've noticed about 5 more of these chairs in the garage of a house two doors down from where the garage sale was. Did the person I buy this from borrow it from their neighbor and then sell it to me? Crazy to think of the possibilities there. I am so tempted to knock on the door where I saw the others in the garage and ask if I can buy them. Or maybe I should let them know I have their missing chair? But I'm certain they'll want it back! What should I do?

Well in the meantime I have big plans for this beauty! If you love her now, just wait until I'm done with her....or maybe all 6 of them if I dare go knock on the door...

0 Comments

Welcome to my home office...

10/19/2015

0 Comments

 
Picture
As I had mentioned this all began with an idea in the basement and well, as I also mentioned, I am still in the basement!

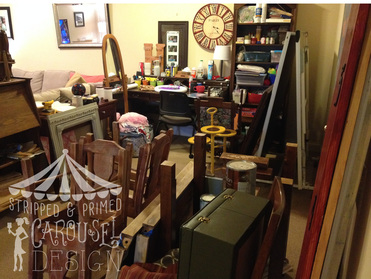
Welcome to my office. I thought my first blog post on this site should be me showing you where this sanding and priming is taking place.

I'm not sure about you, but personally I do really well when I have lots of projects going on at once. There are just times that after I begin a project I get a little stuck and cannot see it all the way through. I lose inspiration and need time to set it aside and not work on it for a while until the inspiration comes back. Don't get me wrong, an unfinished project drives me a little batty, but I simply cannot finish it until the inspiration is there (or until my 4 children are not in my way) and often times other projects help inspire each other.

So while I let one project sit and rest, I begin another project. I actually cannot wait to start on the secretary you see in this photo. I picked out my finishes for it already (which I will keep a secret) but to ensure that I was satisfied with the finishes I chose to use them on a smaller piece to be sure I was going to love it on such a beautiful secretary desk as the one in the photo! And guess what?!? I did love it on the smaller piece so it won't be long now. You'll just have to wait for it's reveal.

In the upcoming blogs I'll show you the gun cabinet I turned into an awesome Camo Curio! I have a cute little "Bumpkin Patch" craft for you to do with your kiddos that you're going to love and I'll show you how NOT TO sew a bench seat cover. Very exciting stuff, I know. So look for it. It is coming... 


0 Comments

    Author

    I am a  mother of 4 small children. I am happiest when I am busiest and if the kids don't keep me busy enough I need projects to fill my days.  I love Jesus and I love my family and I love the chaos around me for it brings the calm.

    Archives

    October 2022
    November 2016
    March 2016
    February 2016
    January 2016
    December 2015
    November 2015
    October 2015

    Categories

    All
    Birth Stories
    Family
    Food
    Furniture
    Holiday
    Home Improvement
    Marriage
    Raising Children

    RSS Feed

Proudly powered by Weebly
  • Home
  • About
  • Contact
  • Blog
  • Store