Stripped and Primed Carousel Design
  • Home
  • About
  • Contact
  • Blog
  • Store

Stripped and Primed Carousel Design
Blog

Eggnog Pancakes

11/21/2015

0 Comments

 
My husband made fun of me the other day when I came home from the grocery store with Eggnog. He made some comment like "Welcome to 'November', the season on Eggnog" As to say that you are really not supposed to buy eggnog until December.
But everyone knows a month of December is not enough for eggnog. There should be at least two months we are permitted to drink eggnog and make all kinds of eggnog goodies. It's kinda like the pumpkin craze in October that carries into November and December! Eggnog should have it's time too!

And so, I decided to make Eggnog Pancakes

And I can promise you my husband was no longer complaining about me buying Eggnog in November. It's no Betty Crocker kind of recipe. It's straight from the box with a few minor adjustments! I hope you enjoy! I know my family did because there are none left to share!

Here is what you will need: 3 Ingredients

Picture

1. 3 cups of  Pankcake mix. 
(Anything you have in  your pantry will do. Otherwise, if you are looking for a good mix inexpensive mix, I buy mine at Target. It's $2.12 per box and then I get my 5% off by using my Target Card! )
2. 2 cups of Eggnog 
(I like the real Eggnog. Nothing that has artificial sugars or non-fat crap. And it's always cheaper when you buy the store brand.  
3. 1 cup of Chocolate Chips
(Let's face it, chocolate chips make everything better! But let's also be real about how expensive they are lately....Everywhere. So I buy mine from Costco in a huge bag for about $8.00 and they last a while. I put them in the kids muffins, yogurt, and obviously pancakes too. With Chocolate Chips, I do not substitute for the off brand. They are no good. Always get Tollhouse. They are the best! If you find the mini's, they are even better!

Directions

1. Follow mixing directions on the back of the pancake mix box. Except where it calls for water or milk, substitute Eggnog in it's place. For example, if box calls for 2 cups of water, use 2 cups of eggnog instead.
If the box does not call for any eggs, you can still add one. It'll make your pancakes extra fluffy, as will the eggnog.

2. I pour my mix into a cupcake batter dispenser or also called a cupcake pen. If you do not own one of these you should buy one right now! They are amazing for pancakes or the like. My kids love pancakes and these help make all pancakes fun. You can make animals, letters, number and other things so easily! Even if you are just doing circles, they come out even and perfect every time!
3. If you are using a griddle, set it for 325. If only take a second to warm up and use your dispenser pen to make circular pancakes.

4. Place two or three chocolate chips on each pancake while it is cooking. One the top of the batter starts to form little bubbles, flip pancake to chocolate chip side down. Only leave down on the chocolate chip side for about 30 seconds before using a spatula to scoop up and put on a warm plate.

5. I like to stack the pancakes as they come off the hot griddle so they keep each other warm. The only problem I have is that my kids don't wait for breakfast to be served, They immediately start steeling warm pancakes off my stacks and by the time I'm finished baking all the batter, the pancakes are nearly gone!
Picture

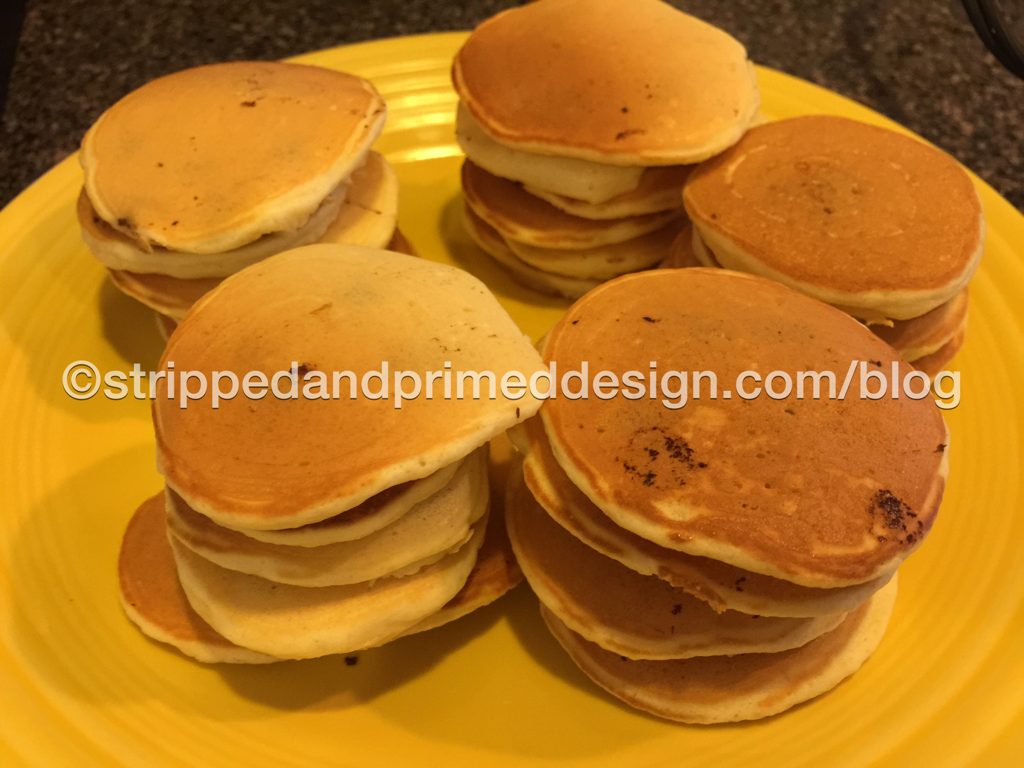
The reason why I put chocolate chips in pancakes

For many breakfasts I have made pancakes and used syrup or honey for dipping sauce. With a two year old, two four year olds and a six year old, syrup and honey end up everywhere. All over my table, all in the hair and if it is a school day then we would spend time getting syrup and honey out of hair. It drove me nuts.

So I switched to plain pancakes and I started to spread a bit of Nutella or Peanut Butter on each pancake and served them that way. Well, I had no luck with that. I ended up getting peanut butter and chocolate all over the kids hair, hands and faces.

And this is why I landed on putting chocolate chips inside the pancakes. Something about having those little bites of chocolate inside eliminates any need for any kind of dip or spread. No syrup in the hair or peanut butter smeared all over their clothes.

Hope you enjoy some Eggnog Pancakes yourself! If you've made them before or do something different, please comment on your Eggnog Pancake secrets! Or if you try this for the first time, leave me a comment and let me know what you think!  

0 Comments

Mid Century Side Table

11/11/2015

2 Comments


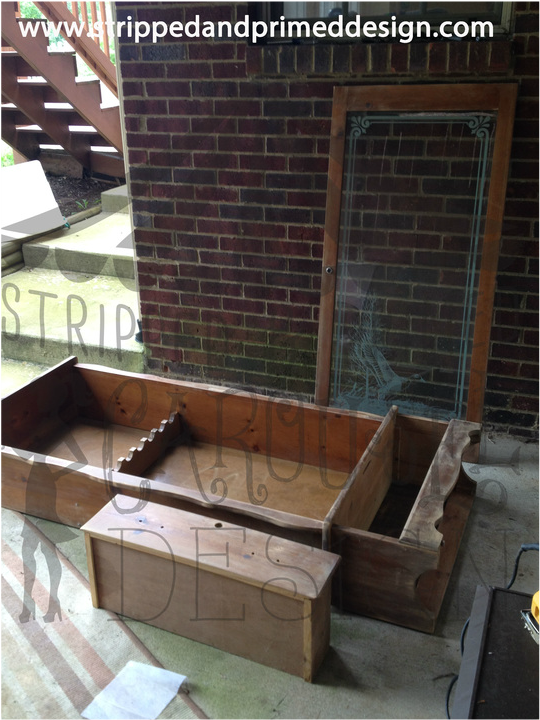
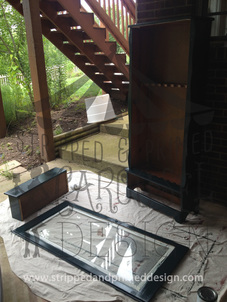
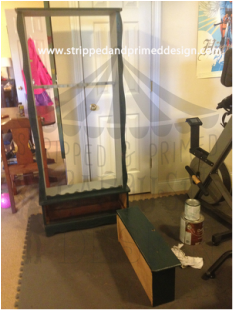
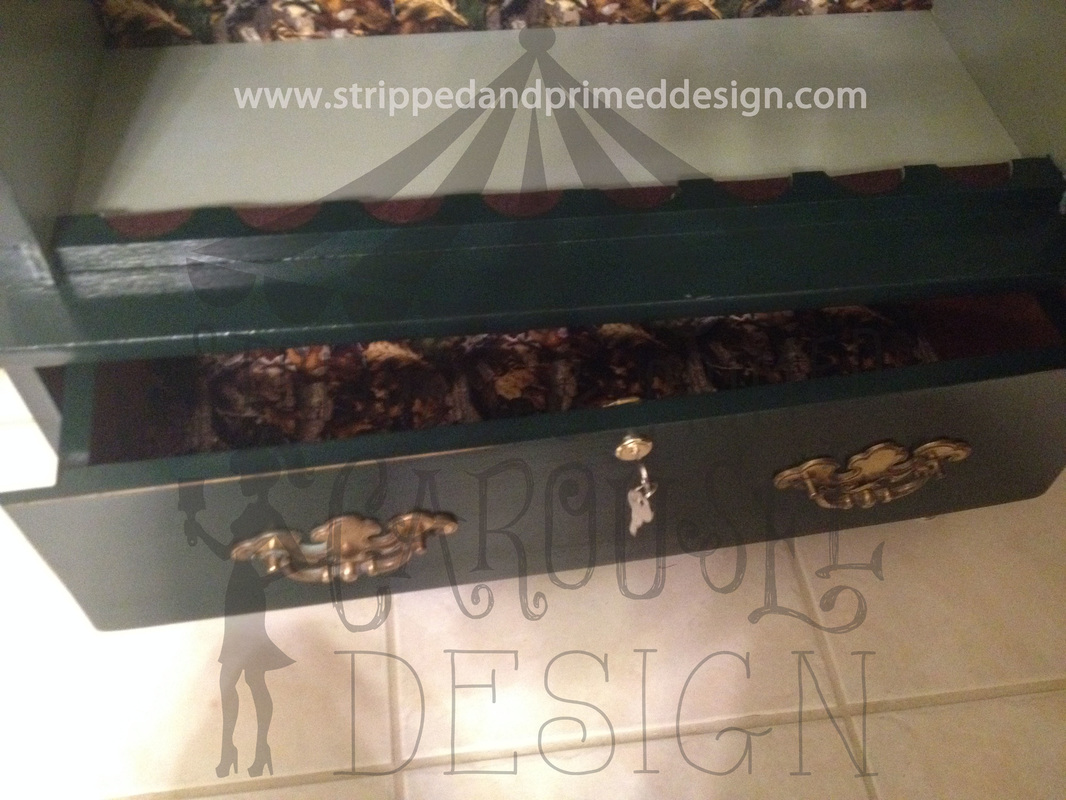
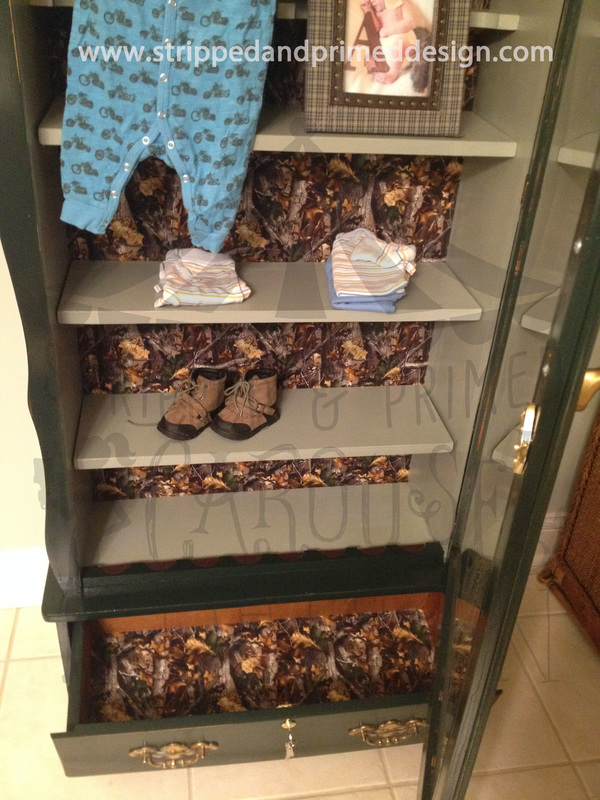
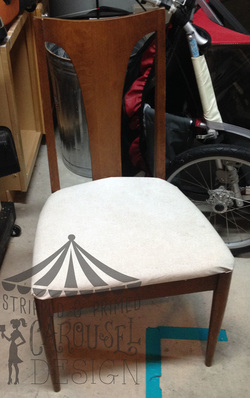
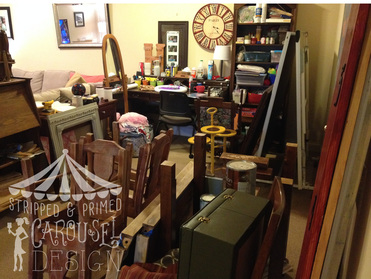
I got this little cutie today. She was accompanied by two adorable side chairs that I may go back to get another time, but for now she is the only one that came home with me.

Picture
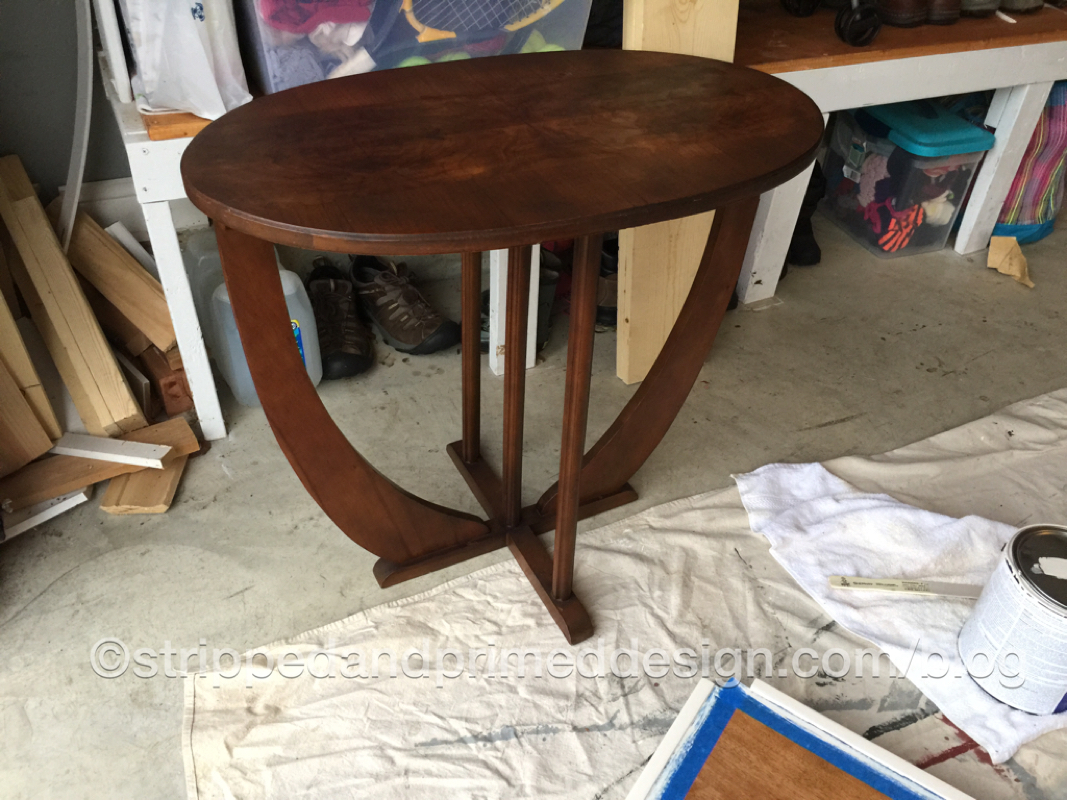
She does need refinishing. Although she looks okay in the photo, the top is uneven and looks like someone tried to remove some water stains.
What do you think? Should I refinish her back to her original self? Maybe go for a lighter stain? Or a darker ebony? Should I paint her? I'm about to break out some aqua for a few other pieces. Not sure I can picture this little thing blue, but I definitely can picture her white or grey.
Tell me what you think?? How would you like to see her refinished?

And don't forget to thank a Veteran today! Happy Veterans Day friends!

2 Comments

Marriage Made of Steel: The Secret to a Happy Marriage

11/10/2015

 
It's our 11th Wedding Anniversary this month. So the title to this post is fitting because on the 11th year of marriage you are supposed to gift your spouse something of steel.

After 11 years together I'm feeling like our marriage is now made of steel. Not all steel, of course there are lots of other things that make up our marriage. But it has formed and woven together all these years making it strong and sturdy just like steel. So if the proposed 11 year gift is "steel" then we've already got it! (Although, I can think of a few new shiny stainless steel appliances I'd love to have too!)


How we got here:  A powerful secret to a happy marriage


As I reflect back on the last 11 years I've stumbled across something and realized it is what has made our marriage work all these years. It has made our marriage stronger all these years.

It is something everyone does but often times are told not to do. More than not it is done incorrectly and can end up ruining a marriage.

It's an essential part of being human but often we refuse to participate in this activity because we don't like it or we are too scared of the outcome or we don't learn how to progress along with it. 

But this act is the key to why my husband and I are still married 11 years later.


So what is it you ask? Is it...

  • Faith in God, surely this is  the most important, right?
  • Lot's of "stripping and priming" (wink wink), yes, that's a big part of it too.
  • Laughter, is of course a given. You have to have laughter!
  • Being able to laugh at yourself, also a very important ingredient to a good marriage.
  • Forgiveness, yes, yes, very important. 
  • Faithfulness, gentleness and self control, we could just add the rest of the Fruits of Spirits here to complete our list.
Picture

All the components above are great ways to attain a happy marriage.  But something is missing from that list. An act that encompass' everything on the list, but isn't on the list itself. Something that has driven our marriage into incredible depths over the years. Depths in our faith, our intimacy, our laughter and forgiveness, all due to this one thing.

The Real Secret Behind A Happy Marriage is...

Arguing.
Yes. Arguing.
ARGUING!!!

Straight from
Webster himself:

To
Argue: verb ar·gue \ˈär-(ˌ)gyü\
intransitive verb 1: to give reasons for or against something : reason <argue for a new policy>
2: to contend or disagree in words : dispute <argue about money> transitive verb 1: to give evidence of : indicate argue his innocence> 2: to consider the pros and cons of : discuss <argue an issue> 3: to prove or try to prove by giving reasons : maintain argue his case> 4: to persuade by giving reasons : induce argue her out of going> 
 

A-R-G-U-I-N-G

This is why we have been married 11 years and we still like each other and we still cherish each other and we still respect each other and protect each other. It is because we are willing to argue with each other.

Arguing isn't always about the destination of winning the argument, although often it can be, but it's also about the journey of discussing and maintaining our thoughts and opinions even when they differ from each other. It is a form of communication and when done properly can bring two people very close.

Now, don't hear me wrong. We haven't always been very good at it. There is a difference between arguing and quarreling and you can read more about this difference at the
Alpha Dictionary if you are interested. Frankly, we haven't always been on the right side of that difference.

However, we've both been willing to learn. We've gotten better at arguing with each year that has passed. We've become more gentle, more constructive; more attentive. And as with all things you need lots of practice to get good at something. And trust me, we are still practicing.


But here's the thing, no one tells you
how important arguing is.

Certainly no one told me that the secret to a good marriage was to argue with your spouse. Our pastor who did marriage counseling with us before our wedding did give us marriage-saving advise. He advised us to never use the "D" word if we argued. 

We took his advice which surely has saved us some headaches. Visit
Simple Marriage or Hodges Podges
 and see for yourself the benefits of not using the "D" word.

But we were still clueless.

Before I got married I saw my newly wed friends arguing with their spouses and I thought they were doomed. Then I got married and argued with my spouse and thought we were doomed and we were just newlyweds ourselves.

We were clueless.

Even the Bible says you shouldn't argue.
Philippians 2:14, simply put "Do everything without grumbling or arguing".

And I couldn't really recall ever seeing my parents or respected adults in my life argue.

But arguing is inevitable. It is going to happen in every marriage. So we embraced it. We had to learn to let each argument teach us how to argue more effectively the next time.  

Over time we saw some arguments lead to productivity and sometimes we saw our arguments bear fruit.

If you remember even Moses
(Exodus 32:9-14) and Abraham (Genesis 18:16-32) argued with God and God listened.

Here's some of what we've learned along the way to mastering this skill.


1. We had to learn what not-to-do when arguing


If I look back at the things we argued about in our first year of marriage, I see how trivial they were. Seriously, we got into an argument because I heard my husband tell someone that I slept later than him in the mornings and he had to make his own breakfast every morning.

The shock and horror that went through me when I heard this. Because I knew certainly, for sure, I woke up, on occasion, some mornings, maybe just the weekends, earlier than my husband and made him breakfast. And after hearing him say that I never made him breakfast infuriated me. I'm pretty sure I threatened to actually never make him breakfast for the rest of his married life and if he got married to have breakfast made for him each morning then he married the wrong girl!!! (Woo-wee! Glad I got that off my chest...again!)

But for real! This was one of our first married arguments. And it may or may not have involved a broken plate of eggs on the floor.


It was in that first year of marriage that I realized that I slammed doors! Not only did I slam doors, but I opened doors just so I could slam them! I didn't even know I did this until I got married because quite honestly no one had ever made me that mad before.

And I threw things! I remember my husband making me so mad that I looked down at the coffee table to see a cup of burning hot coffee and a remote control and knowing I was going to reach down, pick one of them up and throw it. Which one do you think I chose?

Picture
Well, after I envisioned my rug stained in coffee and all the glass I'd have to vacuum up I chose the remote control. However, I had failed to foresee the dent mark it would leave where it hit the wall and I failed to foresee my husbands reaction.

He looked at me and said, "great you just broke my favorite thing in the whole world.".

True story.  

Honestly, it felt so good to throw things and slam doors, but I was admittedly ashamed, especially when it took me hours to  to put the remote control back together so my husband could have his "favorite thing" back.


I learned that year that throwing things and slamming doors when arguing was not okay. It only elevated things and was not constructive.

My husband learned that year too. If you can just picture me, the non-Hardison-by-birth, standing quietly in the middle of the room while my husband, the Hardison-by-birth circled around me, squawking and squealing and puffing out his feathers and cockatooing and being loud and obnoxious and leaving no room for me to say a single word because my voice couldn't be heard over all the noise and chaos.

Fortunately for me sometimes he would squeal and squawk and cocatoo all over the house. And on one beautiful, sunny afternoon, I slipped out the front door and took the dogs for a walk while I listened to him squawking all through the neighborhood. When it finally got quiet, I went home and found him sulking on the couch. "Where did you go?"

And my husband learned that year he couldn't cockatoo at me anymore. It wasn't constructive and only elevated things.

We had to learn that some of the arguing we had witnessed and learned in our pasts was not good, nor healthy nor constructive for us and we had to learn what not to do.


2. We had to learn that sometimes 
arguments needed to be gentle

Picture

The years passed by and we continued to argue.. And sometimes there were arguments even in happy times.

We got pregnant and we argued about who we should tell and when we should tell people. Somehow our neighbors found out we were pregnant before some of our family members. We had different philosophies on telling people what and when and how and it created arguments that taught us about each other.

Then there were the painful arguments about losing a pregnancy. One of us only knew how to morn privately and one of us only knew how to morn surrounded by friends and family. So we argued gently with each other in our sadness.

Then the possibility of facing infertility and more arguments came. Would we ever get pregnant? Should we do treatment if we can't get pregnant? Should we adopt if we can't get pregnant? We argued our different opinions with love and support and we saw something in ourselves we had not seen without the help from each other. We argued deep.

We lost friends and family members who went on from this world and we had no choice but to be gentle in our arguments about funerals and continuing to love the living in a new way and precious memories.


3. We had to learn to argue with respect
for each other

I can remember as clear as day when I first heard the words everyone who is married should hear at least once from their spouse, "It doesn't matter if I don't understand it or I think it is crazy. If it is important to you, then I will respect it because I love you."    

I had asked my husband not to participate in something because of my own insecurities.  I'm not even sure why other than it just made me uncomfortable and that's all I knew to tell him. With just a little hesitation, he finally said the words I needed to hear: if it was important to me that is all that mattered. 

And just like that, my husband respected me in an argument letting me know I was more important to him than whatever it was that he didn't understand.

It took me a little longer to learn this same lesson when arguing. He would get upset about something I didn't understand so I would decide it wasn't worth the argument to me. 

And I'd use those arguments as a free ticket to stay up all night, eat ice cream in bed and watch Sex In The City reruns while my husband lay awake discontent in the other room. 

However, it was that sense of security that I felt when he was willing to not participate in something because of my insecurities, even when he didn't understand, that finally taught me to respect the issues that bothered him even when I didn't understand.

Now I just wait for him to go out of town so I can stay up all night. I've just traded the eat ice cream in bed for a few glass of wine in bed and instead of Sex In the City reruns I'm addicted to 
HGTV
!

4. We've had to learn to let go and trust the other person when arguing 

Eventually we had children.

And once our children were born we began to argue about child rearing. Our parenting styles were different. One was often too soft and one was often too firm.

I had to remind myself (and still do) that my husband is 50% of the parental role in this family. If I claim to have all 100% stake as parent then I would not be trusting the plan God put in place. Our children need their daddy even if I disagree with him at times. 

My husband had asked one of our children to pick up some toys before going to bed one night and they refused to obey.

I told the same child they could go to bed and pick the toys up in the morning because it was painfully obvious to me they were just too tired to obey.

My husband demanded the toys be picked up that night and gave me a stern warning with that look stupid look in his eye, not to help.

Picture
That child sat next to the toys without moving a bone for hours.  I didn't like it but I trusted my husband to do what he needed to do as their father.

The toys eventually got all picked up. And then I witnessed something beautiful. My husband curled up with his child in his arms who had obeyed him. And they bonded. They fell asleep in each others arms that night, both drained, but stronger as an entity.

But there are times we don't get it right.

There was that one time my husband argued that I wasn't sleep training one of our children to his standards. And so I let him do it and was shocked when I heard the child stop crying for a long period of time. I peeked in the room only to find him sitting as still as a statue scared his breath would wake the sleeping child while he sat INSIDE the crib with the sleeping child on his lap. There was nothing for me to do except laugh hysterically. He justified that his method worked and he got the baby to sleep, never mind that he was INSIDE the crib with her. After that night he trusted me to do the sleep training my way and I'm proud to report that I've never climbed inside my child's crib.

There are arguments about discipline and sleep training; homework, soccer and baseball, ballet and dance, television and computer time, appropriate movies, video games, room arrangement, food, vacations and the list goes on and on. And we have to trust each other to parent our children together.

5. We had to learn to argue with our guard down

It was just the other day as a matter of fact that we had an argument while getting ready for bed. It was this specific argument that made me realize  all the arguing we've done over the past 11 years has actually been the key to deepening our marriage.

We were in the bathroom, both completely naked. (Yes, I'm sorry to give you such a visual because trust me, it's not pretty these days.) But it is how we were when this argument occurred.

In our complete nudity, my husband was getting out of the shower and I was stepping in it. We were unwinding and cleaning up from the grind and busyness of a long day's work. And in the midst of our nudity we began arguing about one of our investments that was causing a headache for us.

Should we cash it in and invest it in something else with less of a headache or do we continue to deal with the headache and uncertainty and risk for an unpromised future? We were on completely different sides of the issue and both upset that the other didn't agree.

It dawned on me in this moment of arguing, in the nude, so cordially, on a topic we both were passionate about, that we had come a long long way since that first argument over breakfast that ended in a broken dish and dirty eggs on the floor.

But you see, that first argument was so incredibly necessary to get us to where we are today. And we are only 11 years in with a LONG way to go.

We argue about faith and God, sex, money, children, time management, what to eat for dinner, and all the other important ingredients that make a good marriage good. We are two different people, from different backgrounds and different families and we are married to each other, living in the same house, sleeping in the same bed. We are one and yet, we are two.


We love each other enough to be willing to argue about our differences so that we can ultimately understand each other better and deeper. And I pray we always can and will.


So Raise Your Glasses

So raise your glasses with us as we celebrate 11 years of marriage. And next time you catch yourself saying to your spouse, "It's not worth the argument",

Stop and think...


Do you really not want to argue? Is your relationship not worth it? Can you not only learn something about your spouse from the argument but maybe something about yourself? Can the argument deepen your understanding of each other?

Or if you hear yourself tell your children, "Please stop arguing with me!" like I always do,

Stop and think...

Do you want your children to have their own voice and know that their opinions and feelings matter even when they are different from yours?

The "Code Of Conduct" from my kids school states that they are encouraged to "Appeal respectfully and courteously". The children know that they have a voice even when it differs from their teachers.

Isn't this what we want for them at home? Isn't this what we want for our marriages?


So raise your glasses with me and cheers to a new year and a new argument.
Picture

Happy Anniversary Babe. I love you forever and while I don't necessarily look forward to our next argument, I know it will be soon. I look forward to it being with you and the outcome from it. Let's bear some more fruit (and I don't mean children!) You're my bestie.

Are You "The Candy Keeper?" : What To Do With All That Candy!!!

11/3/2015

2 Comments


Did your children dress up as Goblins and Ghosts, Princesses and Superheroes and come home with loads of candy?

Picture
Have you been deemed "The Candy Keeper" and you are the only one that holds the key (or can reach on top of the fridge) to the beloved candy bowl?

Are you now dealing with whining children begging you for a piece of candy every single minute of every single hour?

Then continue reading to get tips on what to do with all that candy and how to handle your new roll as "The Candy Keeper"!

I have given you three options that our family has tried over the years. The first option is fun and generous. The second option is my favorite. And the third option has its place and time!

Option 1: Donate or Trade


You can donate your candy to the troops overseas.  Check out the Military Missions for packaging and mailing instructions.  Operation Shoebox is another great resource.

To read more about how to donate your candy yourself please read here.
Operation Gratitude tells it all!

If you do not want to package and mail the candy yourself then check with your local health food store or dentist office. Many healthfood stores and dentist will trade your candy for a healthy treat or toy and they will mail it off for you to be donated! 

We participated at Earth Fare a few years ago! My kids got a healthy treat as a trade off  for their candy.  

Donating the candy or trading it makes for a great lesson on "giving" and "sharing" with the upcoming holiday season! Not to mention once the candy is gone you will no longer need to be "The Candy Keeper"! 

2. Separate and Dissipate (my personal favorite)

There are a few steps for Separating and Dissipating.  If you follow the instructions below you will find when your candy is separated it begins to disappear much quicker and your job as "The Candy Keeper" will be over in no time.

Step One: Determine the trash

Picture

Remove all the candy you don't want your children eating and throw it away.

For me, this is typically anything too sticky that will end up on my furniture, tables, chairs and walls...or worse stuck in their teeth. Things like taffy. I also throw away the hard candy such as jolly ranchers and jaw breakers. Basically anything that can get lodged in the throat of a 2 year old. I include the "bubble gum" in my throw away pile as well. My kids LOVE gum, but this extra sugary bubble gum serves no purpose for me. 

WARNING: You might feel a sense of guilt throwing it away.
Push through. You do not need to feel guilty.  
If you have a compost pile in your back yard then these items will make great compost!


Step Two: Get your school snacks

Picture
Take anything that is in a decent sized package and store it away for lunch boxes and school snacks as the weeks go on. This includes packages of cookies, animal crackers, fruit snacks and anything else you deem snack appropriate. 

Store it in your pantry up high and only take one out at a time when you are preparing lunches.

This will also cut your grocery bill down by a few dollars for those few weeks of snacks you will not have to buy!

As a matter of fact my kids all took a pack of Oreos for their school snack today and they were thrilled because they usually do not get Oreos for snack!

Step Three: Get your bribe and keep it close

Picture

Weed through the candy and put all the lollipops and place in a separate pile.

I like to keep them in my purse and car so they'll be easy to reach when I get desperate and need to bribe a child to be quiet or stop crying.  

I've been known to pull a sucker out of my purse at church and stick it in a kids mouth and I'm not ashamed!

Lollipops have always been my go-to bribe with my kids, so sorry candy bowl, these are all mine.  

Step Four: Turn sweet into sweet and salty

Picture
This is my favorite step because I love trail mix. This is where I win at Halloween time!

Empty out the contents of all M&M packages into a zip lock bag (and I like adding the milk duds too).

Be certain to throw all packaging away...at the very bottom of the garbage so your children do not see the empty wrappers!

Then combine said items with any nuts and raisins that you may already have in your pantry. My personal favorite is cashews, almonds, pistachio's, craisins and raisins!

We love a good trail mix in our household and this will give you a healthy-ish snack for weeks to come!

Step Five: Turn the Orange into Green

Picture
Find all the chocolate that does not have a  "Halloween" logo on it. Place this new found chocolate stash in a zip lock bag and hide it all the way in the back of the freezer.   

As all the orange from Halloween starts to all fade away and all the Green begins to appear for Christmas this frozen chocolate will stay hidden in the back of the freezer.

Do not take it out again until Christmas Eve.
The night before Christmas you simply divide it up among all the kids Christmas stockings. Walla! No midnight run for candy. (Not that that I have ever actually forgotten candy for the stockings before and had to run out at midnight!) 

The orange Reese's wrappers will be extra green bills in your wallet when you're not having to buy MORE candy at Christmas time.

Step 6: Let them have the rest

Now whatever is left over they can have. You can decide how they have it. You can either continue reading and follow Option #3 below, which we have done and works well.

Or you can ration the remaining candy out. I like to allow them to pick two pieces of candy after each meal until it is gone. If they eat their entire breakfast, they get two pieces. Same goes for lunch and dinner. 

With this formula: 2 pieces per child times four children times 3 meals a day means that we will eliminate 24 pieces of candy a day until it is gone. If my estimate is correct that we have about 100 pieces of candy left at this point then I will only need to be "The Candy Keeper" for 4 1/2 more days.

3. Just say "YES"

I'm sure you will judge me for this method of dealing with Halloween Candy and that is okay.

Judge away.

I tend to use this method when we receive birthday party goody bags, or with Easter basket candy and other similar times throughout the year when the children come home with an exaggerated amount of candy.

I tell them to get all their candy, dump it out and eat as much of it as they want. I give them a time limit based on how much candy their is. I would estimate that 10 minutes is a good standard time limit.

When the time is up, the remaining amount that they cannot eat will get thrown away afterwards. However in my experience there really isn't that much left worth saving anyway. It's all trash after they've opened each piece and licked it all.

The reason I use this method and I actually really like this method is because they are so focused on getting through all the candy they tend to take one bite of each thing or even just a lick and then they move on to the next piece. They don't even eat it.

And this method is great because I don't have to spend the next several days or weeks as "The Candy Keeper". I hate that title anyway. I have enough jobs as a mom I don't need to add "The Candy keeper" to my resume. And I tell my kids "no" enough without having to always say "no" to the candy.

So with this method, you just say "yes". And you only have to say "yes" once and your job as "The Candy Keeper" is over!

WARNING: You will find a little backlash with this method. You will have children or at least one child who will come to you the next day and ask for a piece of their candy. You will simply have to remind them that they ate it all the day before and it is gone. 

You may get a "That's not fair" or "I didn't finish it" or "You shouldn't have let me do that". But it will be short lived and they will move on to other activities...eventually.

You will also have the child who gets a tummy ache and begins to feel sick. This too shall pass quickly. If you're lucky they will stop liking candy all together after eating so much at once and your job as "The Candy Keeper" may be over not just for this year but for all the years to come...if you're lucky. I have not experienced that yet by using this method.

Picture

Now Your Turn
Leave me a comment and let me know if you have tired any of these methods to release yourself of "The Candy Keeper". How did it work? I'd love to hear of other ideas too that I haven't' thought of yet. Please share... 

2 Comments

Gun Cabinet turned Camo Curio

10/24/2015

10 Comments

 
I actually went looking for this gun cabinet. I had this crazy idea that I wanted to turn an old gun cabinet into a curio. I pictured it being painted bright yellow and set up in a kitchen with a cute little tea set collection inside displayed on all its new shelves. I pictured a little hook on the side where one would hang their oven mittens and kitchen aprons. 
Well guess what!???!! That is not what happened. Every used gun cabinet I found had a sale price of $120 or more and no one wanted to budge on their price...until I found this little cutie. The previous owner of this one wanted it gone and negotiated a decent price.
Picture

And of course it wasn't until I picked it up to realize just why they wanted it gone. If only you could smell a photo. This cabinet reeked in the worst way. I can't even describe the smell to you. Certainly it was from a smokers house. But it also smelled musty and every other bad smell you can think of combined with smokey and musty. I'm not kiddy. I hesitated to load it in my car in fear that my car would then reek for days, weeks, or maybe forever. I rolled all the windows down as I drove this one home. You can imagine my husbands enthusiasm when he saw (and smelled) this sitting in the garage. I got a, "you paid money for this?" 

And if you must know, it wasn't just the smell. Every crevasse of this little thing was full of roach eggs and spider webs and bug poop.
Lets just sum it all up and say it was beyond gross.

So I did what any normal person would do. I took it completely apart and sprayed it with a bed bug killer and Raid concoction, rubbed it down with a vinegar solution and taped dyer sheets to it to absorb the smells and kept it outside in the sunshine for days.


One thing I really loved about this cabinet was the etched duck on the front. When I bought this I knew it wasn't going to be painted bright yellow to house someone's tea cup collection, rather, I knew this was going to have a hunting theme to it and would go into a little boys or girls room who loved hunting and it would house his or her clothes or toys. Or possibly it would go in a man cave or home office to be used as a liquor cabinet. Especially since I planned to make it lockable.
Picture
After the first step of taking it all apart to de-bug it and try to de-smell it, I worked hard on sanding it all down. And sanding it some more. And sanding it again. I believe that when refinishing a piece it is important to sand it down to its bare self. Hence the name "Stripped and primed". It's one thing to just paint over it with some chaulk paint and make it beautiful. I love chalk paint. Love it, love it, love it.  But often its used to paint over all the previous layers. And sometimes that is okay. However, I feel like it's can be similar to moving into a house to peel the previous owners wallpaper only to find 6 different layers under it. So to me it is often important to get it back to where it started and then lets make it new from there.
Picture
After it was sanding, and sanded and sanded, I wiped it down with a wet cloth and let it dry. I began the painting process. I chose a hunters green. A lot of thought went into choosing this color. Not really. That was a joke. I used this color because we had a whole gallon of it left over from when my husband built the kids sandbox in the back yard and he painted the bottom of it green. When I first began to paint the green was quite bright and so I mixed it with some left over black paint we had from when we painted our mailbox. Both were outdoor/indoor latex paint and they mixed nicely to form this dark green color. Perfect for my Camo Cuiro I was creating!
Picture
I took the back panel off and painted the interior of the cabinet grey to give it some dimension. I debated whether or not I should paint the back panel grey as well, but decided it would be really fun if I could find some awesome hunting fabric or contact paper to cover the back panel in. I ended up settling with a fabric because I felt it would be more durable than contact paper. I cut shelves and painted them grey as well. I installed the shelves with simple L-brackets and not only did I line the back board in a hunting fabric, but I also lined the bottom drawer with the same fabric. It was beginning to look amazing. But even once I had put it all back together there were so many finishing touches that still needed to be tended too.
Picture
I removed the old locks that no longer had keys as one was a silver and one was bronze. I keyed them alike with new gold keys to match the pulls. I had to polish the pulls and while I thought about replacing them, I decided to keep them because I really loved the character. They just took a lot of polish and elbow grease but cleaned up nicely. I added new felt to where the half circles were to rest the guns on previously, but I liked the detail there so just needed fresh felt. I added a pull handle to the cabinet that was not there before. I installed new leveling glides on the bottom so it no longer tilted or rocked when upright and I also had to realign the glass cabinet door so it no longer rubbed on the bottom when opening and closing. I gave a good sanding at the end to give it a wear-and-tear look and then I put several coats of polyurethane on it to keep the paint from chipping in the future.
Overall I am extremely proud of how this "Camo Curio" turned out and I think it would make such an awesome addition to a boy or girls hunting theme room. It would also fit great into a man cave. You could put books in it, or collectables, or would make a perfect liquor cabinet you need to be able to lock your children or spouse out of with a perfect drawer at the bottom for your cigars. All in all, I'm in love with it and I hope you like how it turned out too!
Picture
Heres a final look.
Picture
10 Comments

Chairs Chairs Chairs...Mid-Century Chairs

10/23/2015

0 Comments

 
I mean really, is there anything cooler than a gorgeous Mid-Century Chair? Check out this beauty that I picked up at a garage sale.
Picture

I will not be painting this girl. I will be polishing up the stain and I already have my fabric picked out. I am going to pair it up with an amazing sewing stool from the mid-century as well that I came across not too long ago! I almost passed up the stool because it had missing buttons and was ripped where they used to be. I try to follow my rule not to buy anything broken...but how hard can it be to find the right size fabric buttons and cover them in fabric and and sew them back in? I guess I'll find out soon.

This chair and the sewing stool look like they were a match made in heaven and they haven't even been refinished yet! I am super excited about getting started on this project.

I actually thought this was a Bernhardt chair when I first picked it up. But with a quick google search I found it
here and here. Looks like a Broyhill Brasilia Chair. Pretty cool huh?
I was not actually out garage-sale-ing it, I was headed to the grocery store and I had just my two girls with me. They noticed the garage sale on our way to the store and asked if we could stop. Of course I said yes! But oddly it was 4pm on a Saturday afternoon. The girls picked out a little pink ring and watch and I got this baby.

It's been a several weeks now and on my recent trips to the grocery store driving the same route, I've noticed about 5 more of these chairs in the garage of a house two doors down from where the garage sale was. Did the person I buy this from borrow it from their neighbor and then sell it to me? Crazy to think of the possibilities there. I am so tempted to knock on the door where I saw the others in the garage and ask if I can buy them. Or maybe I should let them know I have their missing chair? But I'm certain they'll want it back! What should I do?

Well in the meantime I have big plans for this beauty! If you love her now, just wait until I'm done with her....or maybe all 6 of them if I dare go knock on the door...

0 Comments

Quick Dinner for 6

10/23/2015

0 Comments

 
I had plans to go out for a glass of wine with a friend after the children were in bed. This is a rare occasion. And quite frankly I can't remember if it's ever happened before. I'm guessing it has but after 4 kids my memory is shot so in actuality it may be an isolated occasion. The only one of its kind so far...or at least in the last few years.

I knew I needed to fill my children's belly's before I left and especially my husbands, because let's face it, he'll have a much better attitude about me leaving him with four children if he is served a nice warm meal upon arriving home from work.

I enjoy cooking for my family but sometimes I just don't feel like cooking! Do you know that feeling? You may feel the same way sometimes so you throw a frozen meal in the oven and wallah! Dinner is served! And there is nothing wrong with that!

I personally did not grow up eating frozen meals and therefore rarely buy them and my freezer is definitely not stocked up with them.  We cook the occasional frozen pizza or chicken nuggets here and there but that's really about it.

So this meal is not a frozen meal per say, although a lot of the food started our frozen! And this mean is really nothing exciting, just easy, healthy and filling! If you don't already have a similar meal stashed away in your recipe book or dinner menu then I hope you will try it.

Here's what you will need:


  • 4 frozen chicken breasts without bone
  • 1 cup of marinade (I used half a bottle of Kikkoman's Teriyaki sauce and 1/4 cup of Maple syrup, but you can use whatever you have! Salad dressings make great marinades as does a simple can of salsa!)
  • 1 cup of water (to be mixed with marinade)
  • 1 bag of steamable veggie's (my kids love edemame, probably because of the salt, but they also love getting the beans out...an excuse to play with their food, but they eat it!)
  • 1 box of macaroni (we bought a huge case Annie's Homegrown at Coscto and we love the healthy choice) 
Picture
Step 1:
You'll need to thaw the chicken in the marinade.
Around 2pm that afternoon I took out four frozen chicken breasts and put them in a zip lock bag. I filled the ziplock bag with 1/4th of the Maple Syrup jar and about half of the Teriyaki sauce bottle. I left the zip lock bag full of my marinade and chicken in cold water in the sink for about an hour then transferred to the fridge as it continued to thaw.

I didn't touch anything again until 5pm and 25 minutes later dinner was served.

Step 2:
Preheat your oven to 400 (I used the conventional setting on my oven, but if you don't have a conventional setting, just go ahead and set it to 400 as well and you'll need to cook it longer).

Step 3:
Arranged the chicken on the pan and set the timer for 10 minutes if using a conventional oven. Otherwise set for 15 minutes.

Step 4:
Flip your chicken over.
After 10 minutes I flipped chicken and cooked another 10 minutes for a total of 20 minutes in the oven. (if not using a conventional oven, cook another 15 minutes on the other side).

Step 5:
While your chicken is in the oven cook your macaroni and Edemame per the package instructions.

 Within 25 minutes my stove looked like this:


Picture

And just like that dinner was served.


Picture

Belly's were full. Children and husband were happy and this momma went out and enjoyed a glass of wine and good conversation with a friend.

Now it's your turn to do the same...

Please share with me what meals you have made that are similar to this one. If you have tried this please let me know what you think! Would love to hear your feedback!
0 Comments

Playing can be Hard

10/21/2015

0 Comments

 
Moms of one only child, I commend you! While it is undoubtably hard work being the mother of four young children I can only imagine the work that goes into having just one child! I'm not at all kidding or trying to be facetious!

I had only one child once...and while it was for less than two years....I do remember it being hard then. Of course I was juggling working full time and being a new mommy, but it was hard. It was like having two full time jobs because this little 6 lb bundle sucked the like out of me, needed me constantly and as demanding and selfish as she was all I wanted was to be around her. I enjoyed my breaks from her when I was working but I felt the mommy guilt that I wasn't giving her enough of my time. So much guilt.

And now on Wednesdays I again have just one child. My youngest is home alone with me from 8am until we pick the big kids up from school at 3:30...and while he is so easy when it's just him alone in some ways, he is still so much work! Almost more work than when all four kids are home because he's got no one there but me.

"Play with me mommy!" He says all day long. "Read to me mommy" he says all day long. "Hold me mommy" he says all day long.

And so we play. Me and my little buddy. And I do what is almost the hardest thing for me to do...I put laundry aside, kitchen duty aside, chores aside, I put myself aside and I play. And sometimes I remember how much joy their is in playing with your own children. It's a lot of work. But it's a lot of fun if you make the effort. You have to be intentional about it or else you'll never know. You have to do the hard work and put yourself aside.


Picture


Having more than one child I just tell them constantly to "go play together" or "I'm busy, you need to go play with your brothers and sisters".

They don't need me to play with them, they only need me to care for them...but that's a lie!

Who knew playing was so hard? But as a mother it is! Setting aside your own to-do list. Setting aside your wants and needs to spend uninterrupted time with your child can be hard!

Moms, let's unite and make playing less hard. Let's strip off the stigmas that moms can't be silly and play with our child...or two...or three...or four of them...and let's take time to play.
0 Comments

The Bumpkin Patch

10/20/2015

0 Comments

 
Picture
It seems fitting that one of my first blog posts on this site should include some actual stripping. And stripping is required to do this fun craft with your kids! No one wants to see an adult "Bumpkin Patch" so please leave adults out of this one and only use your itty bitty bottoms in your house!

First what you will need:

Picture
  • 1. A rectangular canvas. Size is really a personal preference. I used a 10x20 that I picked up at Hobby Lobby and used their 40% off coupon that you can always find online!
  • 2. Paint. I used 3 colors, gold and yellow mixed for my background color and orange for my "bumpkins"
  • 3. Paint brush. You'll want a good size brush because you will literally be painting your child's bottom.
  • 4. Some kind of marker. A black sharpie will work fine if that's all you have laying around. I had a green pen marker I used after it dries for the stems and a brown pen marker I used, again, after it dries to outline the "bumpkins" with.

Directions:
  • Step One: paint the entire canvas with your background color. I choose yellow because it represents fall but is still light enough that the orange bumpkins will show up on top. Purple and grey seem like great colors for the background just be sure they are light enough to allow the Orange to show up on top. I also added a spark of yellow/gold glitter paint mixed in just to add some bling and dimension to the background. Be sure to paint the edges and as you can see I didn't use a plate to mix colors I just simply squirted them on the canvas and used the paintbrush to smooth it out. Don't worry about streak marks or blemishes. It'll dry with dimension and get covered up by some cute bumpkins!
Picture

  • Step 2: let it sit and dry
Picture
  • Step 3: here is where we start "stripping"! Find your little ones and tell them you are going to paint their bottoms orange and use their little bottom just like a stamp on top of your canvas! WARNING! The paintbrush on their bottoms will make them giggle and giggle and giggle! I did this activity 2 years ago when my oldest was 4 years old (possibly the cut-off age to get away with this craft!) At first she wanted nothing to do with it, but after she saw me paint and "stamp" the other three littles bottoms and all the giggling she wanted her bottom painted and stamped too! So get ready to laugh! I suggest doing one child at a time and be sure to overlap the Bumpkins so it resembles a real pumpkin patch. I actually did the two bums on the outside first. Then I did the smallest one in the middle and left room for my oldest daughter in the middle as well. They all overlapped nicely.
  • Step 4: Use your paintbrush to "fill in" any bottom spots that didn't get printed when you stamped the bottom. My oldest son didn't sit all the way down and while most of the outline of his bottom was on the canvas, it appeared that he had a huge crack down the middle of his bum, which was only due to him not sitting all the way down. I was afraid he'd squish his bum around smearing the orange paint which is why he didn't sit down fully. So I took the paintbrush and lightly filled in the spots his bottom didn't.
  • Step 5: Let it dry.
  • Step 6: Use your pens/markers to outline and write title.
  • Once all the orange bumpkins have tried it is time to get out your pens or markers and outline the bumpkins. I outlined the one on the end and the little one in the middle first so that it would look like they were in the front. I outlined them completely and whole. Then I outlined the two left just on the top sides and bottom that would be exposed if they were behind the other too. I drew my stems and colored them in giving them a few curly twigs coming out from the stem. If you aren't sure you will do a good job go ahead and do it in pencil first so you can erase it if you don't like it. But I'm the kinda gal that just likes to wing it and deal with it. After outlining the bumpkins and drawing your stems it is time to title your artwork! I just used our last name "The _______________ Pumpkin Patch" But you could really get fun and creative with the title.
  • Step 7: Put your "Bumpkin Patch" on display! Happy Fall You'll!
0 Comments

Welcome to my home office...

10/19/2015

0 Comments

 
Picture
As I had mentioned this all began with an idea in the basement and well, as I also mentioned, I am still in the basement!

Welcome to my office. I thought my first blog post on this site should be me showing you where this sanding and priming is taking place.

I'm not sure about you, but personally I do really well when I have lots of projects going on at once. There are just times that after I begin a project I get a little stuck and cannot see it all the way through. I lose inspiration and need time to set it aside and not work on it for a while until the inspiration comes back. Don't get me wrong, an unfinished project drives me a little batty, but I simply cannot finish it until the inspiration is there (or until my 4 children are not in my way) and often times other projects help inspire each other.

So while I let one project sit and rest, I begin another project. I actually cannot wait to start on the secretary you see in this photo. I picked out my finishes for it already (which I will keep a secret) but to ensure that I was satisfied with the finishes I chose to use them on a smaller piece to be sure I was going to love it on such a beautiful secretary desk as the one in the photo! And guess what?!? I did love it on the smaller piece so it won't be long now. You'll just have to wait for it's reveal.

In the upcoming blogs I'll show you the gun cabinet I turned into an awesome Camo Curio! I have a cute little "Bumpkin Patch" craft for you to do with your kiddos that you're going to love and I'll show you how NOT TO sew a bench seat cover. Very exciting stuff, I know. So look for it. It is coming... 


0 Comments
Forward>>

    Author

    I am a  mother of 4 small children. I am happiest when I am busiest and if the kids don't keep me busy enough I need projects to fill my days.  I love Jesus and I love my family and I love the chaos around me for it brings the calm.

    Archives

    October 2022
    November 2016
    March 2016
    February 2016
    January 2016
    December 2015
    November 2015
    October 2015

    Categories

    All
    Birth Stories
    Family
    Food
    Furniture
    Holiday
    Home Improvement
    Marriage
    Raising Children

    RSS Feed

Proudly powered by Weebly
  • Home
  • About
  • Contact
  • Blog
  • Store