
|
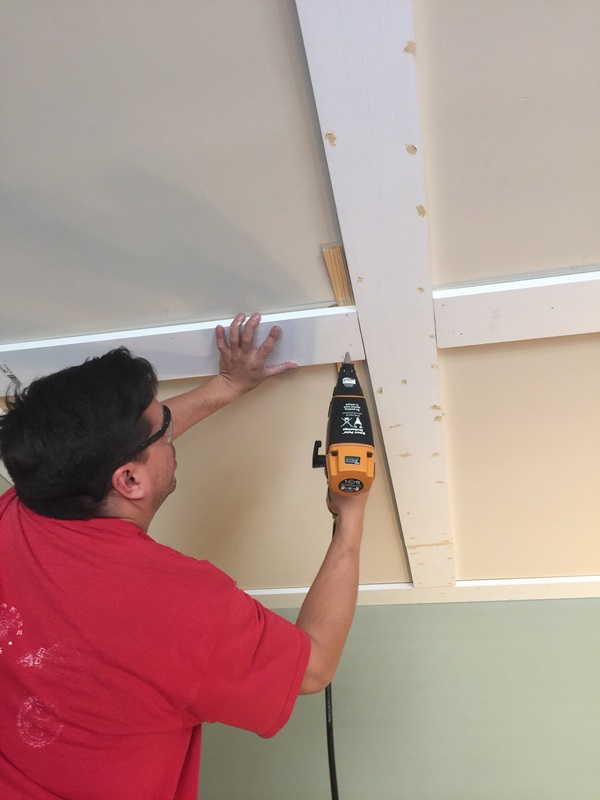
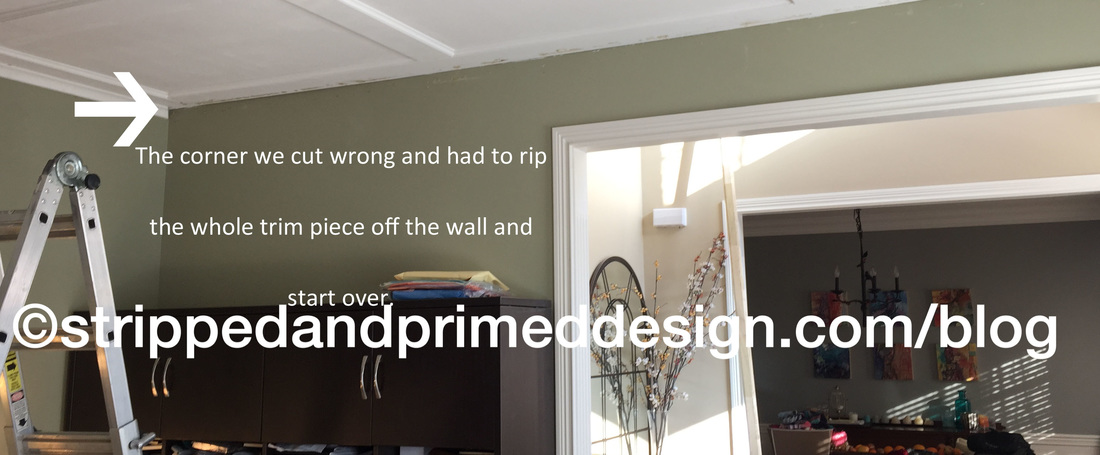
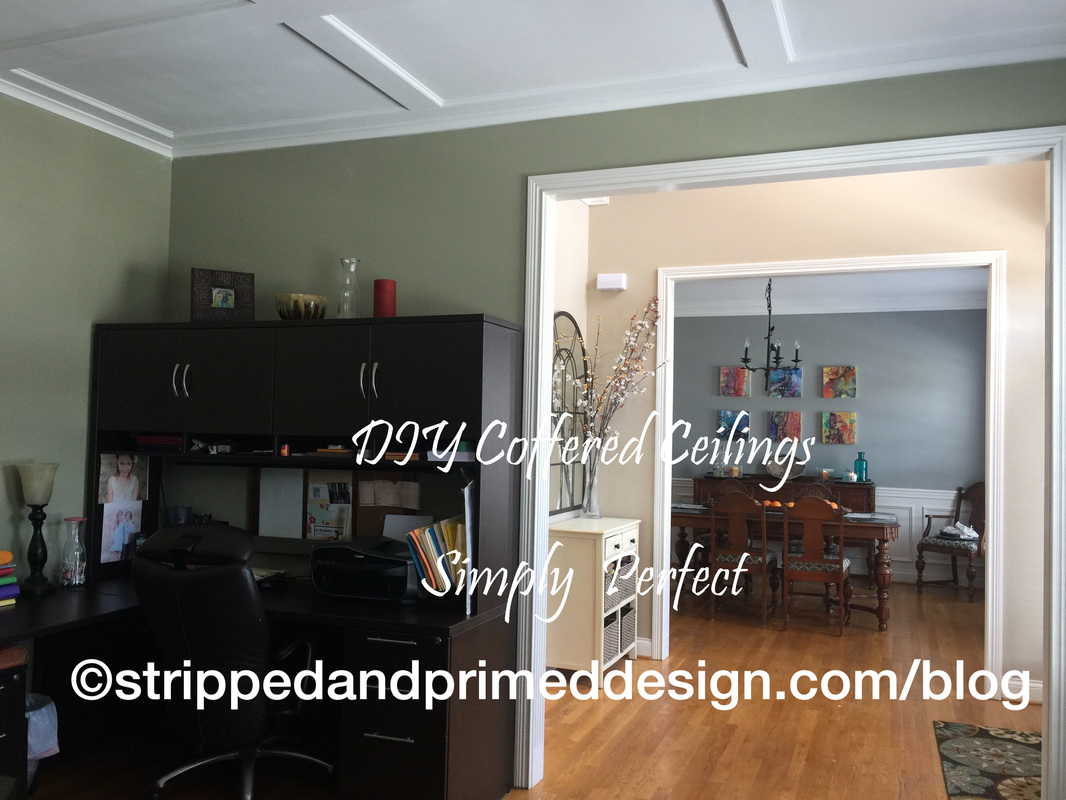
It was New Year's Eve and we had plans to re-create our awesome New Years Eve from the previous year when we had attended our neighbors party. They had a few babysitters on hand and we sent our kids upstairs while we mingled with other adults, drank adult beverages and ate yummy adult foods. We called the kids downstairs to write their New Year Resolutions onto Chinese lanterns and send them off into the dark nights sky, (something I've done with our kids the last several years and wanted to continue to do with our new neighborhood). It was a blast. We sent the kids back upstairs with the babysitters and apparently forgot all about them after someone brought out the Cards Against Humanity game and that's when real fun began. A few neighbors trickled home and but we stayed, along with three other couples and brought in the New Year with hysterical conversations, Champaign and really tired children. Only this year we had decided as a neighborhood that we would host it at our house. And wouldn't you know, the strep throat two of my kids had over Christmas decided to creep back up and got me and one of my other children. We were miserable and there was no way we were going to host everyone in our germ invested home for a party. We made the necessary and sad phone calls to cancel our New Year's Eve Party this year. We were stuck at home sick, with sick kids. Bored. And as we sat in the dining room staring at each other we commented on how nice the crown molding looked that we had hung over the summer. Then we both glance over into our home office, adjacent to the dining room and without missing a beat, said, "we should really do something in the dining room". And so it began. We started googling "coffered ceilings" and read a few blogs and tried to come up with something appropriate for our office. We drew up about 25 different sketches for how the wood would be able to lay based on where the studs were. And I began to think that New Year's Eve wasn't a waste after all, we'd sit here and "plan" our coffered ceilings for the office to be completed in the coming New Year. But I was wrong. Apparently we were planning the coffered ceilings we were about to start installing that night. It was 5:30pm and my husband looked at me and said, "do you think Lowes is open right now?" And I looked back at him and was like, "why are you going to Lowe's now?" But he didn't have to answer. I saw the answer in his gleaming eyes, "to go buy wood for the ceiling, of course". And just like that he was gone. When he arrived back home he had 10 5 1/5" wooden boards that were 12' long each and enough skinny molding do go inside the interior of each box we had laid out in our diagrams. And you guys, check this out. It came out amazing! 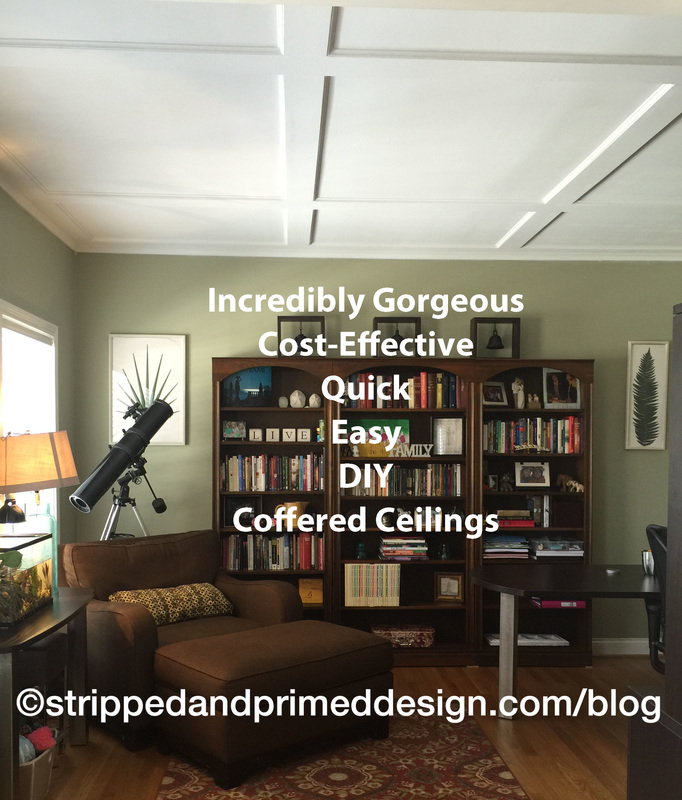 I'm not going to lie. We did a lot of it that night. In between some chicken noodle soup and putting kids to bed we were drilling, banging, painting and drawing more diagrams. We had a few hiccups, but it really went smoothly. The best part is that we were able to do the coffered ceilings for roughly under $300. Here is what we did right:1. We spent a lot of time drawing, re-drawing, and drawing again...on paper...and then on the ceiling...the measurements of the ceiling; exactly where the studs were located and how we could best position the wooden boards to be the most symmetrical as possible and be in the studs. Originally my husband thought we'd place three rows each direction, creating 12 boxes. But due to the size of the room and my desire to have an open box in the center of the room rather then two boards crossing to make an X, we went with only two boards each direction, creating 9 open boxes. 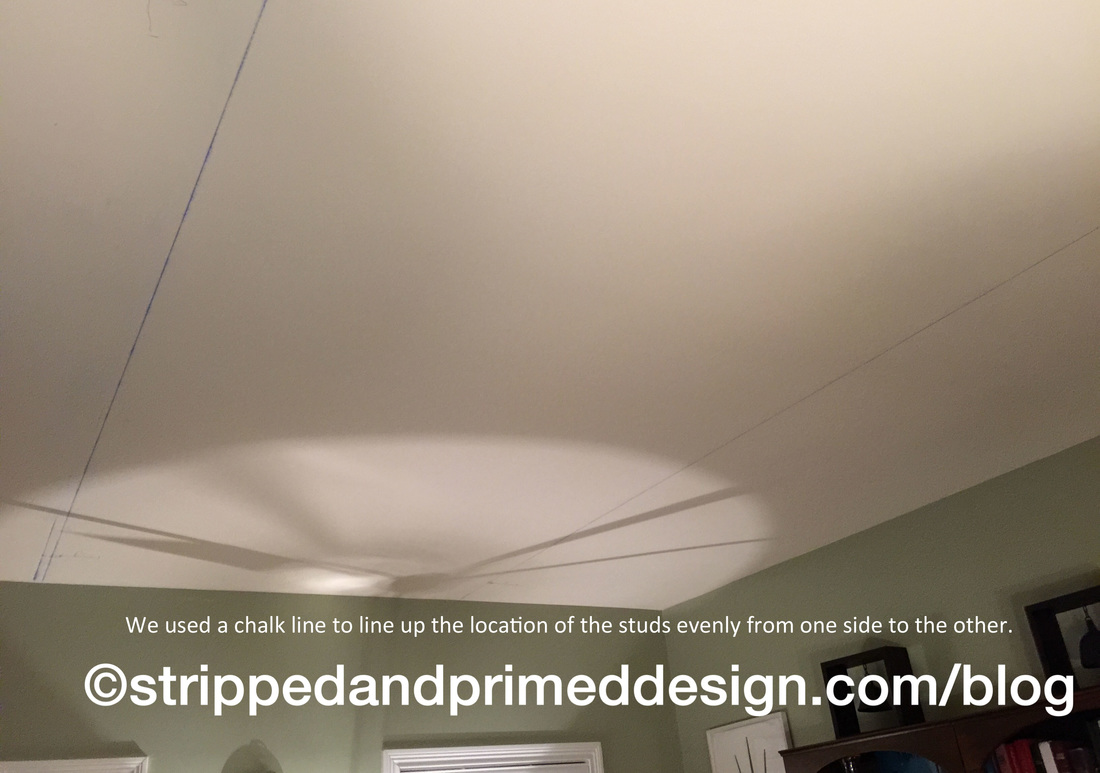 2. We hung the perimeter of the boards first. 3. We nailed in the "fixed boards" that ran perpendicular to the studs in because there was only one place they could be placed. The boards we bought only came in 12' sections and of course, the length of the room is 14'. So it was a bit tricky to have to cut and measure the 2 foot difference and line it up and get it straight and then putty it in where it looked even. due to where the studs were we had a larger space in the middle with two identically smaller spaces on the outter rim. 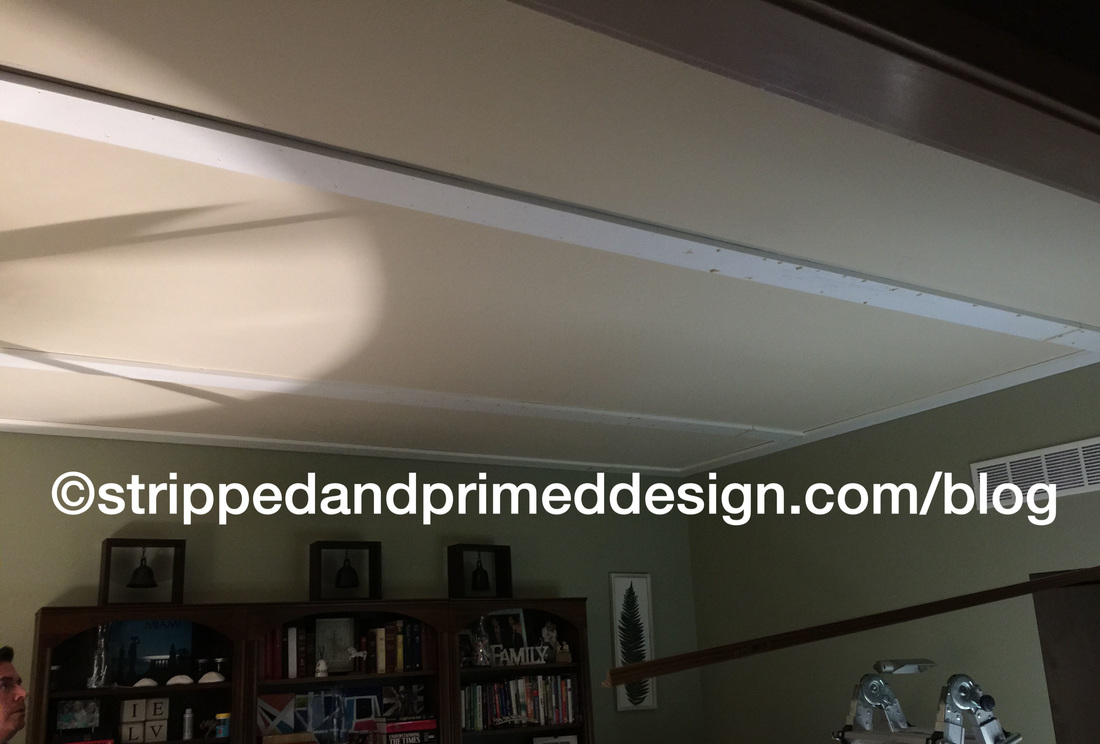 4. Next it was time for the cross boards. Even though we had our drawings on paper for where to hang these, and we had marked them on the ceiling. I was a little hesitant. So I held each board up and drew a line on either side of the board right where it was to be placed. Then I measured the inside of each opening to be sure each opening would be the exact same measurements. These cross boards could be hung anywhere since the studs ran perpendicular instead of the same direction. My inside boxes when measured kept turning up different sizes by just an inch or two. I then realized I had counting for the width of the boards 5 1/2" three times then dividing where they needed to go, which was on our original plans instead of two times which we ended us using only 2 cross boards so I only needed to account for 11" extra inches instead of 16 1/2". Once I corrected my mistake we literally traced them on the ceiling again before we nailed them in. 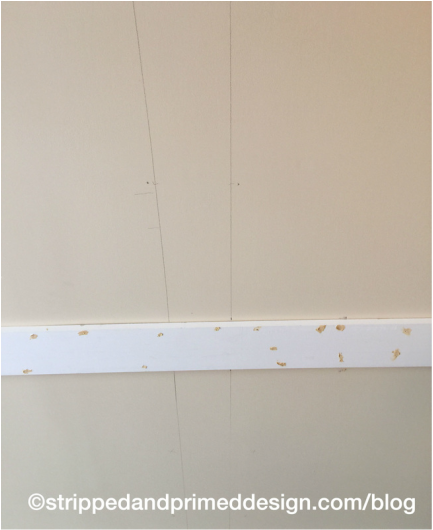 5. We had a few boards that when flush against the wall were not even with the adjacent boards. We used a small wood wedge in between the board and the ceiling to align it with the adjacent board. Once the wedge was nailed in, we just bent it to break it off. The interior trim/molding would cover it up later. 6. While the 5 1/2" boards we bought were already white, the interior trim pieces we bought were not. So we painted those first before we nailed them up. Which was nice...until we ran out of wood. We made a quick trip to Lowe's to get the remaining trim pieces and instead of painted a first coat on those and waiting for them to dry, we just went ahead and nailed them up unpainted. It is really not a big deal either way, but if you have the time putting a coat of white paint on them first is helpful. I would not use ceiling paint. We discovered that the ceiling paint is extra thick and goopy and sticky when applied with a paint brush. Ceiling paint goes on much smoother with a roller at the end to cover everything. So I suggest just a basic white paint on the trim before it is nailed up. 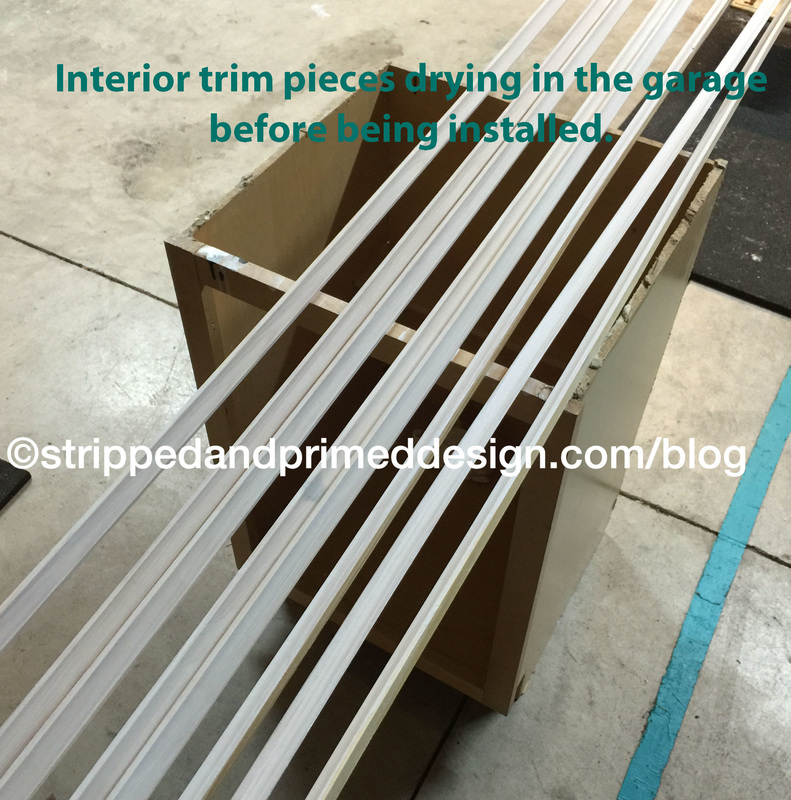 7. We measured each interior trim piece as we went. Measured. Cut. Hung. Repeat. This was tedious, but went quickly. Each measurement was slightly different and we needed to be sure the angled cuts lined up perfectly each time. We had 9 inside boxes with four cuts for each box. But we got it done quickly. 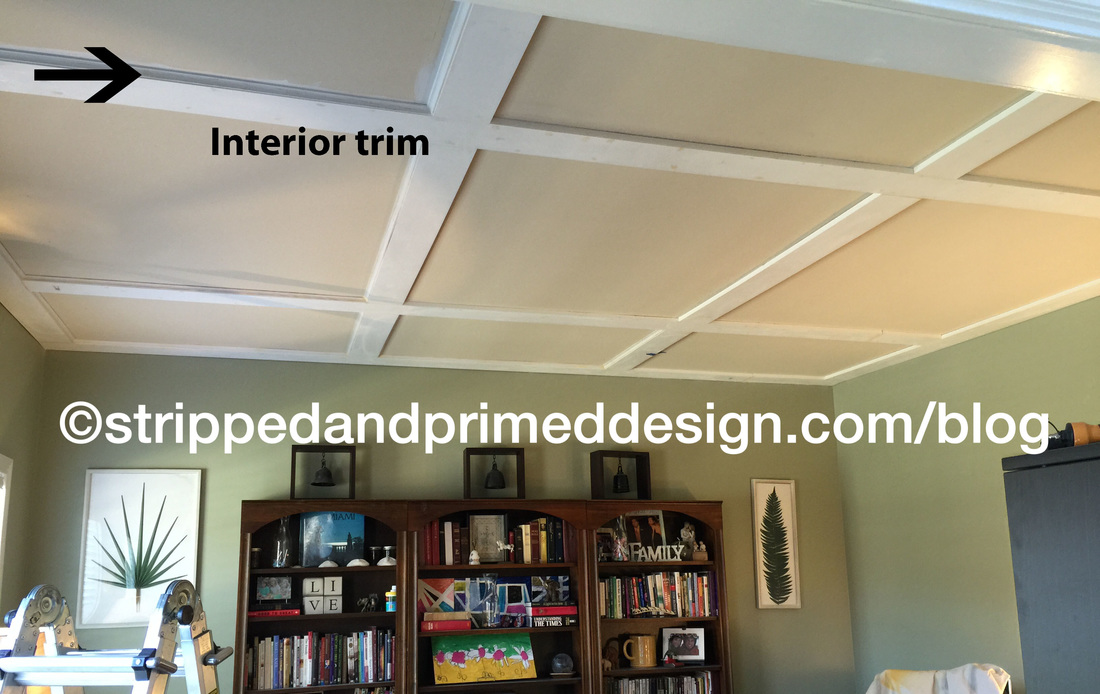
|
AuthorI am a mother of 4 small children. I am happiest when I am busiest and if the kids don't keep me busy enough I need projects to fill my days. I love Jesus and I love my family and I love the chaos around me for it brings the calm. Archives
October 2022
Categories
All
|
 RSS Feed